First Layer Squish
![]() I’m going to call it “squish” to be unambiguous. “Z offset” and “z height” can be conflated with other concepts.
I’m going to call it “squish” to be unambiguous. “Z offset” and “z height” can be conflated with other concepts.
![]() This page is generally compatible with all printers. Commands and setting locations are detailed for Klipper and Marlin.
This page is generally compatible with all printers. Commands and setting locations are detailed for Klipper and Marlin.
- You should
calibrate your extruder first.
- This page is about fine-tuning your first layer squish. You should do a rough adjustment first:
- Basic i3-style printers: Level your bed and get a rough nozzle height using paper.
Klipper: You should do a rough Z offset calibration first.
Marlin: Baby stepping must be
 Vorons: See
  Vorons: See the
 ![]() Thermal Drift article, even if you are not having any issues. Thermal drift is in important thing to know about with larger enclosed printers.
Thermal Drift article, even if you are not having any issues. Thermal drift is in important thing to know about with larger enclosed printers.
Table of contents
Method
-
Set your first layer height to 0.25 or greater (in my opinion).
-
Thicker first layer heights are less sensitive and easier to maintain, especially on larger printers where first layer consistency can be a challenge.
-
Aside from that, this is personal preference.
-
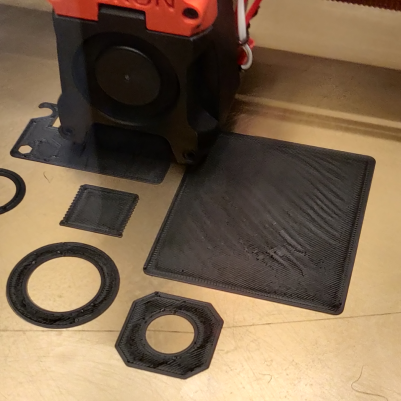
- Scatter square patches around your bed in your slicer.
- See the test_prints folder.
- Choose a patch that matches your first layer height.
(First_Layer_Patch-0.25mm.stlif you chose to follow step 1)
- Choose a patch that matches your first layer height.
-
- Tip: in PS/PSS, you can right-click the “arrange” button and set the distance to a large value.*
-

* To exceed 100mm, either click the edit button on the right side, or ctrl+click the bar.
- See the
-
Set your first layer
line width to 120% or greater. - Start the print. While it is printing, live adjust z (also known as “baby stepping”).
- This can be done via g-codes/macros, LCD, or via your printer’s web interface (Fluidd / Mainsail).
I find it easiest to sit in front of the printer and fine-tune with the LCD. -
 Klipper
 -
LCD
- Under the “Tune” menu (may only appear while printing), look for “Offset Z”.
-
Mainsail
-
Fluidd
-
G-code
SET_GCODE_OFFSET Z_ADJUST=0.01 MOVE=1SET_GCODE_OFFSET Z_ADJUST=-0.01 MOVE=1
-
LCD
-
 Marlin:
 -
LCD
- Under the “Tune” menu (may only appear while printing), look for “Babystep Z”.
-
G-code
M290 Z0.01M290 Z-0.01
-
LCD
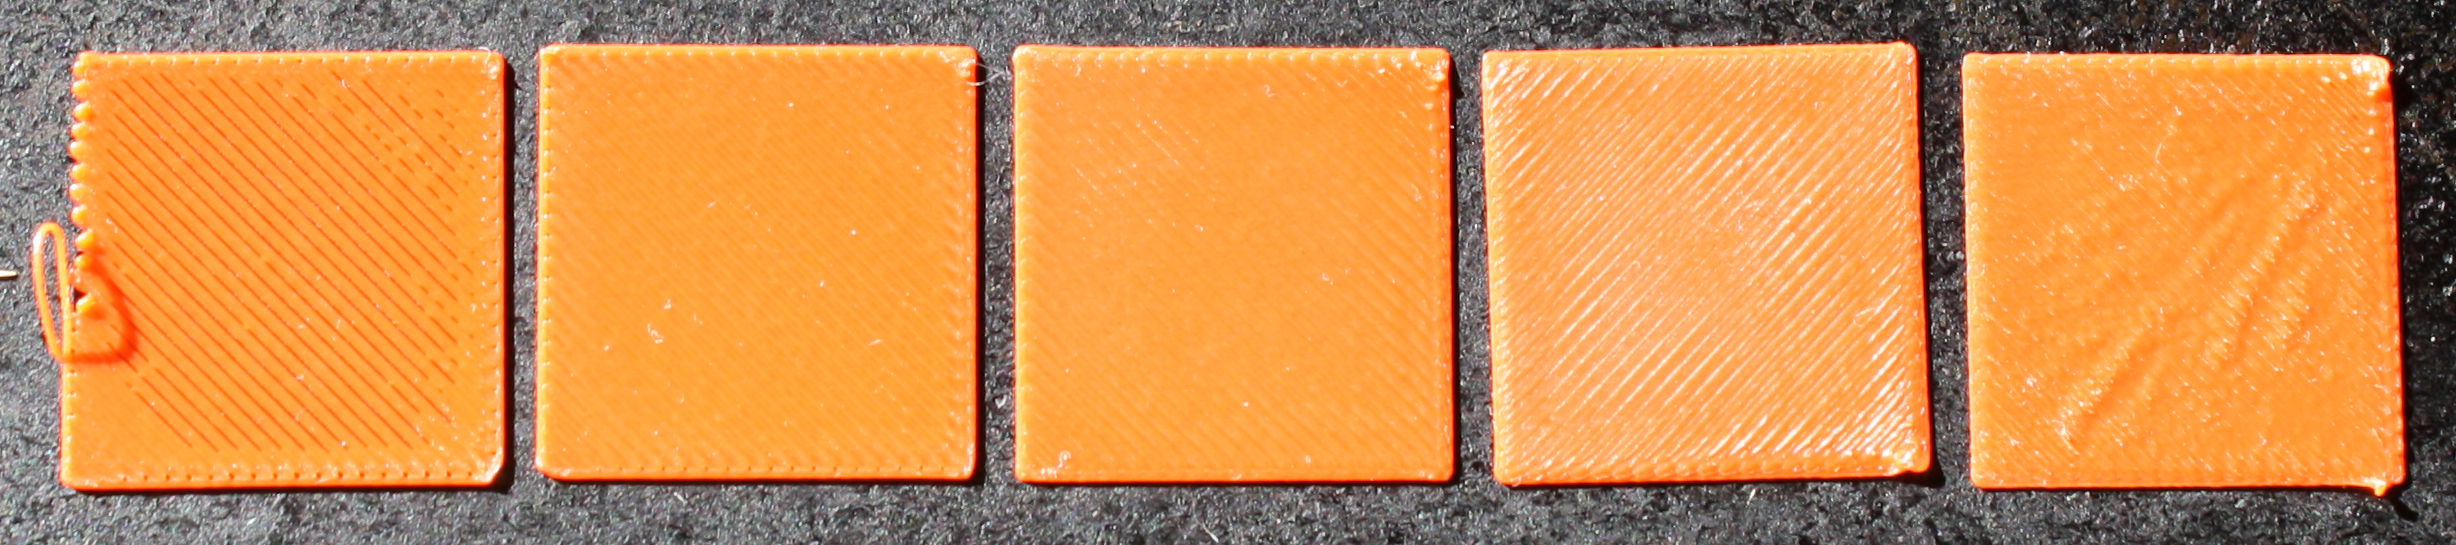
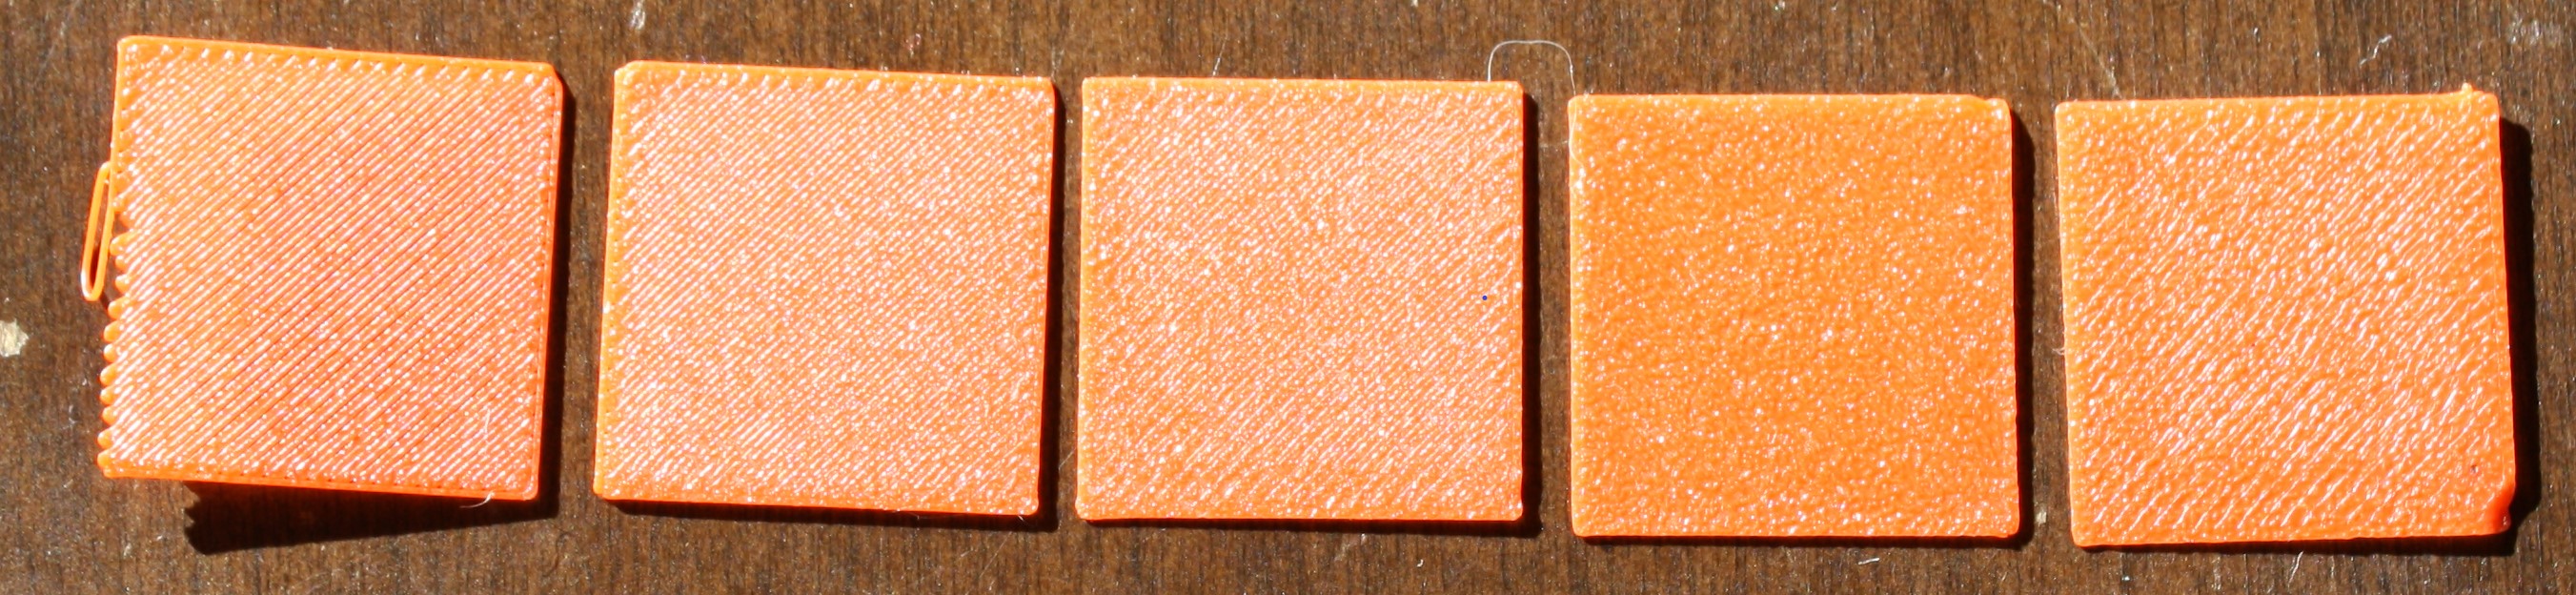
Examples
In these examples, the third square is closest.
There are real-life print examples in the next section.Note: When I refer to “gaps”, I mean where you can see between/through the extrusion lines.
If you can see any light (excluding pinholes at the perimeter), or the next layer on real prints, then you need more squish.
-
Smooth Build Surface
-
Top Surface
- You don’t want too many ridges/hairs on top.
- It’s normal to have a little bit of this near the corners, or in small print areas.
- You shouldn’t see any gaps* between the lines.
- It’s fine to have some very small pinholes where the infill meets the perimeters.
- NOTE: Upon review, somewhere between square 3 and 4 is closer to ideal. If you’re not sure, it’s generally better to lean on the side of a bit too much squish (especially if your offset varies a little between prints).


- You don’t want too many ridges/hairs on top.
-
Bottom Surface
- You should not have any gaps between the lines.
- You should still be able to clearly see the lines at the center. They should not be fading or invisible.
- It’s normal for the lines to fade a bit near the edges/corners.
- NOTE: Upon review, somewhere between square 3 and 4 is closer to ideal.

-
Top Surface
-
Textured Build Surface
-
Top Surface
- Follow the same guidance as for smooth build surfaces (above). You can see hairs/lumps with too much squish, and gaps with not enough squish.
- With textured, I find that I sometimes need to use a bit of extra squish to get a good second layer. I might choose closer to #4.
-
Bottom Surface
-
The lines will not be as visible as on a smooth build surface.
- Note: this doesn’t mean they should be invisible.
- As with smooth build surfaces, you should not have any gaps between the lines.
- With textured, it’s a bit easier to tell squish using the top surface rather than the bottom surface.
-
The lines will not be as visible as on a smooth build surface.
-
Top Surface
- This can be done via g-codes/macros, LCD, or via your printer’s web interface (Fluidd / Mainsail).
- Once you are happy with your squish, cancel the print and then save your new offset with one of the below methods:
-
Klipper
-
Dedicated Z Endstop:
(With dedicated Z endstops. Stock V0/V2/Trident are set up this way)- Enter
Z_OFFSET_APPLY_ENDSTOP*- This will apply your new offset to your stepper_z’s
position_endstop.
- This will apply your new offset to your stepper_z’s
- Enter
SAVE_CONFIG.
- Enter
-
Virtual Z Endstop:
(When using the probe as the Z endstop. Stock Switchwire and Legacy are set up this way)- Enter
Z_OFFSET_APPLY_PROBE*- This will apply your new offset to your probe’s
z_offset.
- This will apply your new offset to your probe’s
- Enter
SAVE_CONFIG.
- Enter
-
Klicky Auto Z Calibration:
(This is a mod, it uses Klicky AND nozzle endstop to automatically baby step before each print. See here for more information.) - Manually adjust your
switch_offsetbased on how much extra you had to baby step.- Higher value = more squish
- Lower value = less squish
- If your value is straying too far from your switch’s theoretical
switch_offset(usually 0.5), there may be another issue at play. Values of 0.4-0.6 are fairly normal (for the standard Omron switches).
- Manually adjust your
-
Dedicated Z Endstop:
-
Marlin
- Select “Store settings” on the LCD or use
M500.
- Select “Store settings” on the LCD or use
-


Print Examples
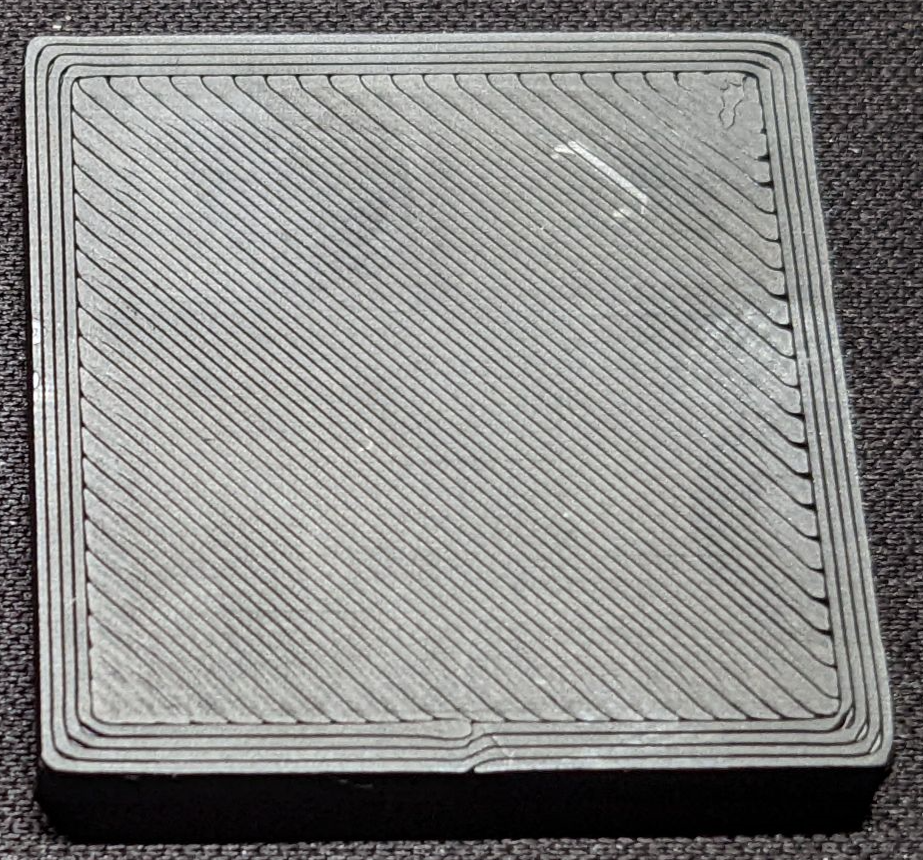
You should still clearly be able to see the lines. If it’s completely smooth, your squish is too much. If you see gaps between the lines, you need more squish.
Good Squish
Too Much Squish
-
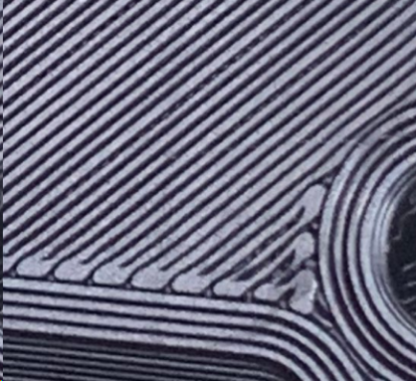
Can’t see any lines, or the lines are starting to fade (smooth PEI):
-
-
Wavy patterns appear:
-
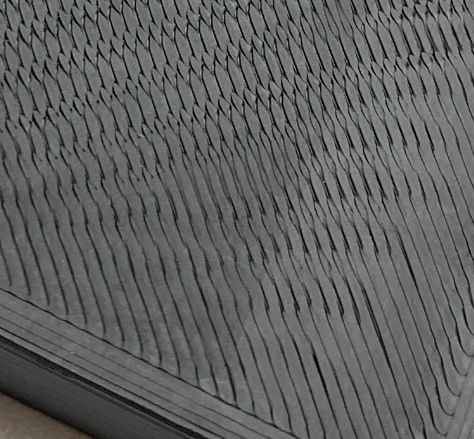
Not Enough Squish
-
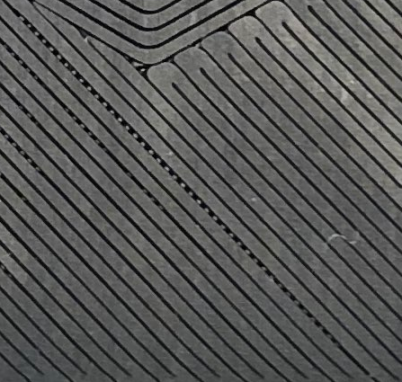
There are gaps between the lines (you can see through to the next layer):
-
Further Fine-Tuning
-
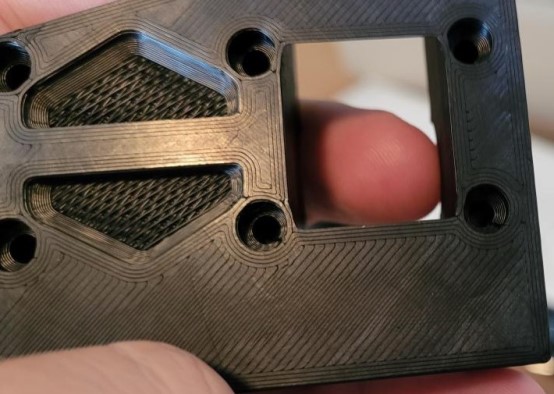
If you have a gappy second layer (or first few layers), it may indicate that you need a little more squish.
- There are other possible causes for this issue (like not heat soaking for long enough, or flow dropoff)
-
This cube needs just a tiny bit more squish.
You can see very slight gapping / shadows between the perimeters and some areas of the infill. The corners are also starting to pull away a bit. -
-
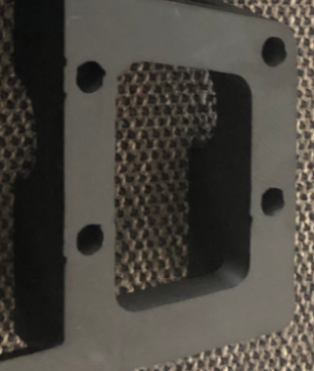
Better!