Voron V2 Gantry Squaring
Poor gantry squaring can cause a number of problems, such as:
- First Layer issues
- Z belts rubbing against the gantry’s printed parts
- X axis to be “racked” at the front but not the back (or vice versa)
Steps 14-16 of the instructions below can also help with gantry stability.
Demonstration
Watch this video.
Notice that the idlers get “pinched” when moving the X extrusion back/forth (this is shown with loose Z joints).
Method
![]() Some have found
Some have found ![]() Z Locks to be useful for this procedure. They are not required, however.
Z Locks to be useful for this procedure. They are not required, however.
- Enter this g-code:
SET_IDLE_TIMEOUT TIMEOUT=99999- This arbitrarily high timeout just gives us time to work. We need the Z motors to be energized and holding for the whole process.
-
G28, thenQUAD_GANTRY_LEVEL. - Jog your gantry to the center of the build volume using the LCD or web interface.
- This will give you space to work. You need easy access to both the bottom and top of your gantry.
- Turn off ONLY your A/B motors using these g-codes:
SET_STEPPER_ENABLE STEPPER=stepper_x ENABLE=0SET_STEPPER_ENABLE STEPPER=stepper_y ENABLE=0
- Loosen your A/B belt tension fully.
- This prevents the A/B belt tension from pulling the gantry out of alignment while you work on it.
-
Your belts should be fully disengaged. If there is still remaining tension with the idlers fully backed off, you may need to release the belt ends from the X carriage.
-
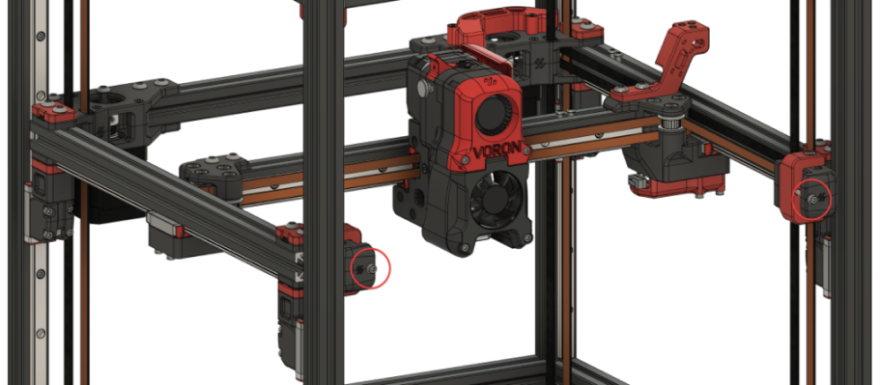
Take off your side panels.
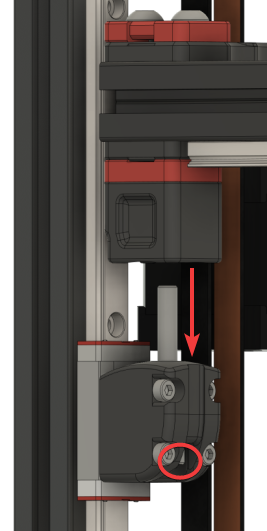
- Unscrew and drop your lower Z joints.
- Your gantry will now be floating on just the belts.
- Make sure your printer is on a fairly level surface, otherwise your gantry could swing too much to one side. (it doesn’t have to be perfect, just don’t do it on a hill),
-
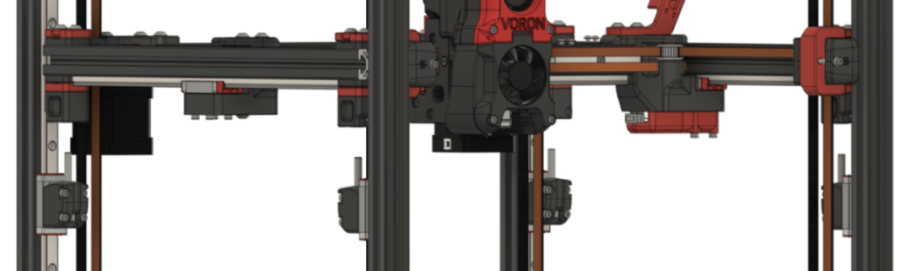
- Your gantry will now be floating on just the belts.
-
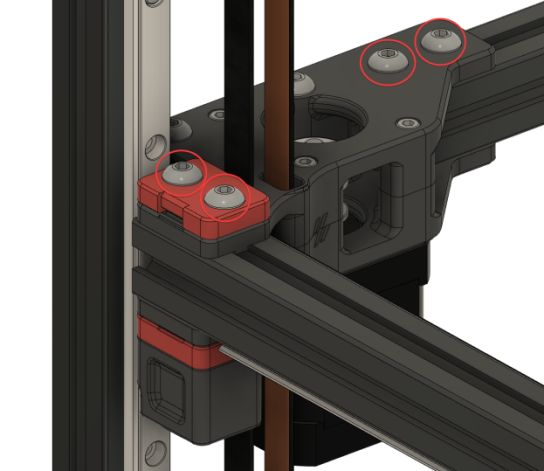
PARTIALLY loosen all connections to the extrusions.
- You need all of these bolts to be loose enough to freely adjust against the printed part on the extrusions.
Where there are Z belt clamps, ensure that you do not loosen the bolts so much that the Z belts release. Only loosen enough to allow for adjustments.
- X/Y joints (repeat for both sides).
- Top:
- Bottom:
- Top:
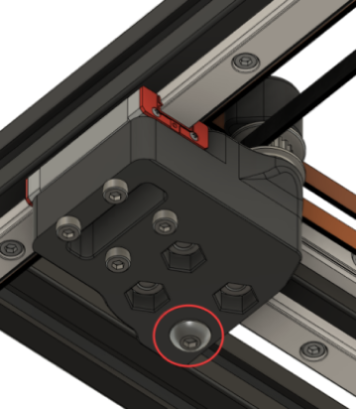
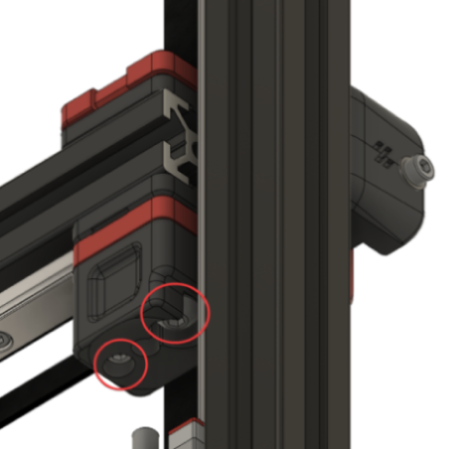
- A/B joints (repeat for both sides):
- Top:
- Don’t overdo the belt clamps!
- Bottom:
- Don’t overdo the belt clamps!
- Top:
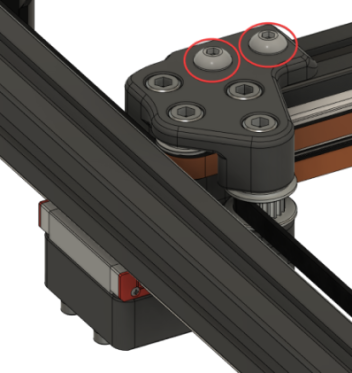
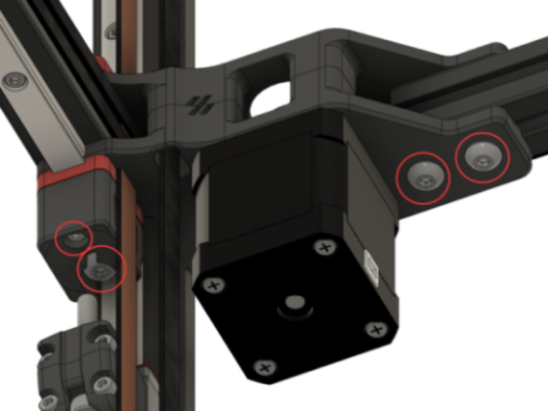
- Front idlers (repeat for both sides):
- Top:
- Don’t overdo it!

- Bottom:
- Don’t overdo it!
- Top:
- And now, what we have been preparing for.
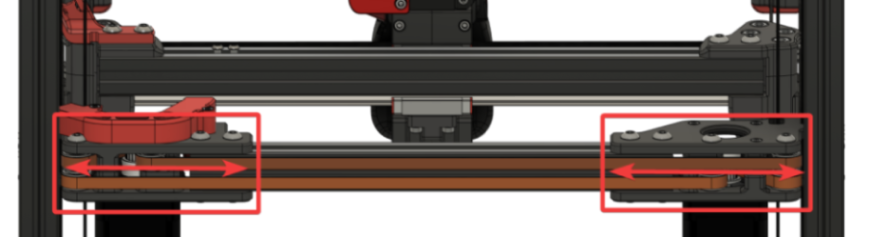
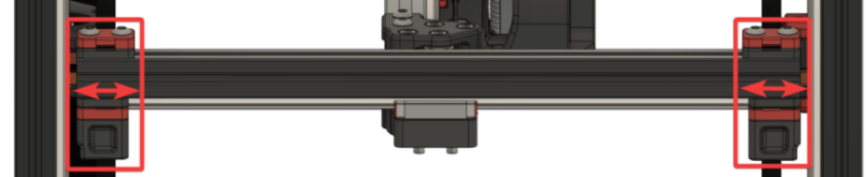
Adjust your gantry so that it sits perfectly on top of the lower Z joints.- This involves moving gantry components further apart or closer together along the extrusions:
-
Rear
-
Sides
-
Rear
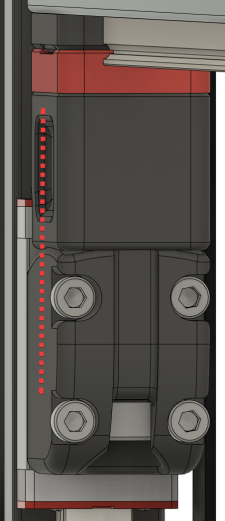
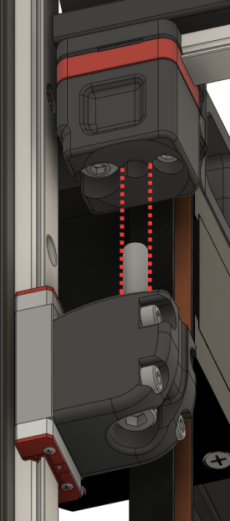
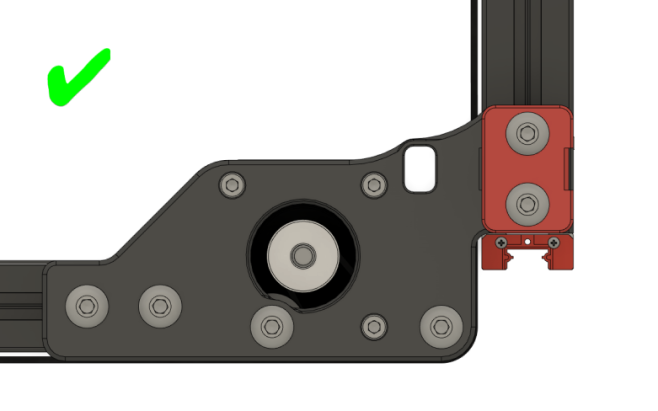
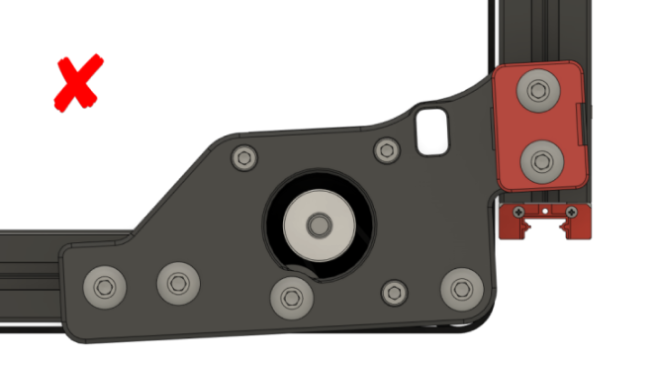
- Your gantry should align so that:
- The Z joints feel perfectly flush along the side, and
-
When raising and lowering your lower Z joint by hand, the bolt slides in perfectly without hitting the sides.
-
- Ensure that you do not inadvertently rotate your A/B joints during this process.
- (Exaggerated)
- This involves moving gantry components further apart or closer together along the extrusions:
- Tighten every extrusion bolt again, except those in the X/Y joints. (you will tighten those during step 12)
- Ensure that your Z joints still align properly. Sometimes tightening can move things around.
- Re-install your lower Z joints and lightly tighten the M5 bolts.
- Don’t fully tighten them down yet - just lightly. The joint should still be able to articulate freely.
- Follow
 Nero’s de-racking video.
 - Make sure to come back here afterwards! The following steps are still important.
- Re-tension your A/B belts (to 110hz over a 15cm span).
-
Reinstall your panels and fully heatsoak your printer for 1½ - 2 hours minimum.
-
QUAD_GANTRY_LEVEL3-5 times to “settle in” the gantry (and level it for the next step).- If you are getting new tolerance / retry errors, you may have left your Z joints a bit too loose. Try tightening them up just a bit more.
- Open the front door and fully tighten the M5 bolts in your Z joints while it’s still hot.
- This does two things:
- Somewhat “locks in” your QGL at its state in full thermal expansion.
- This can help with first layer issues.
-
Stabilizes your gantry.
-
If you have your Z joints too loose, you might notice that your gantry displaces back & forth a bit while printing.
-
This can help with ringing and layer consistency.
-
- Somewhat “locks in” your QGL at its state in full thermal expansion.
- This does two things:
-
RESTARTto reset your idle timeout.