Extrusion Patterns / “Wood Grain”
![]() The concepts on this page are relevant to all printers, but the specific adjustment instructions are tailored to Voron extruders.
The concepts on this page are relevant to all printers, but the specific adjustment instructions are tailored to Voron extruders.
Table of contents
Examples
- See
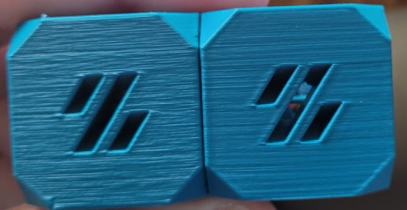
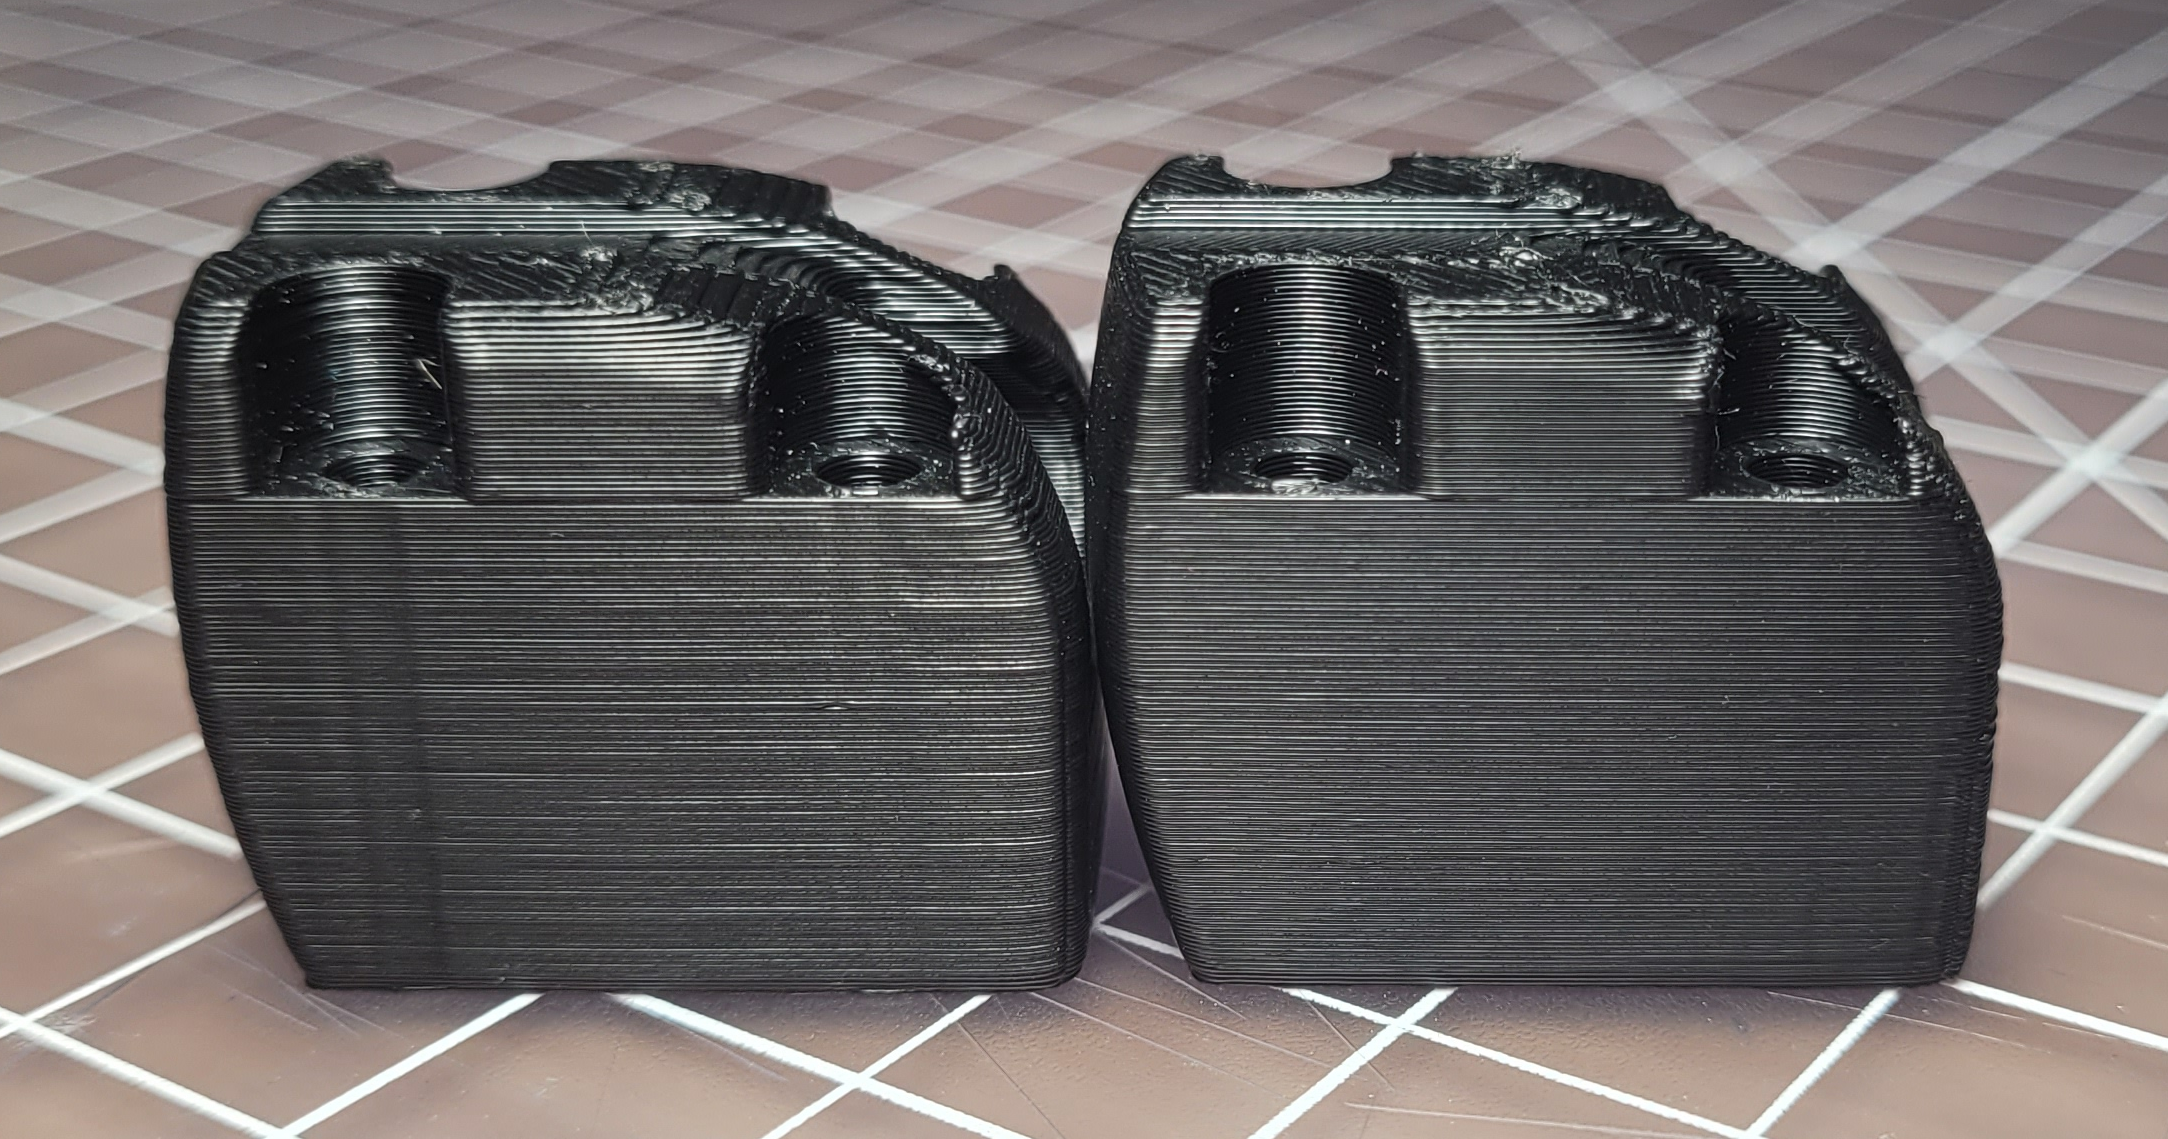
 “Setting Expectations”. You are very unlikely to get this perfect, but some things can be done to potentially improve it.
 - The left cube shows an “innie-outie” pattern across each extrusion line.
The right cube was printed after adjusting extruder backlash, and the pattern is lessened.
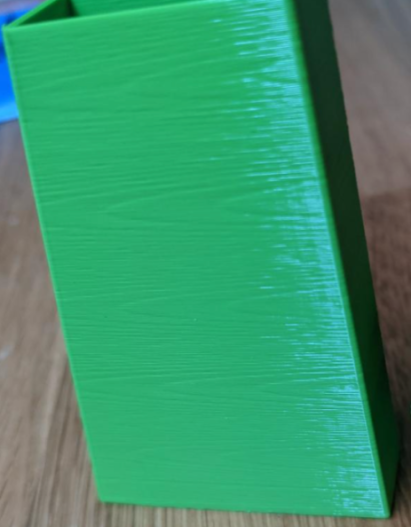
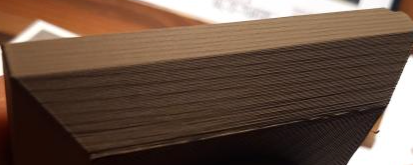
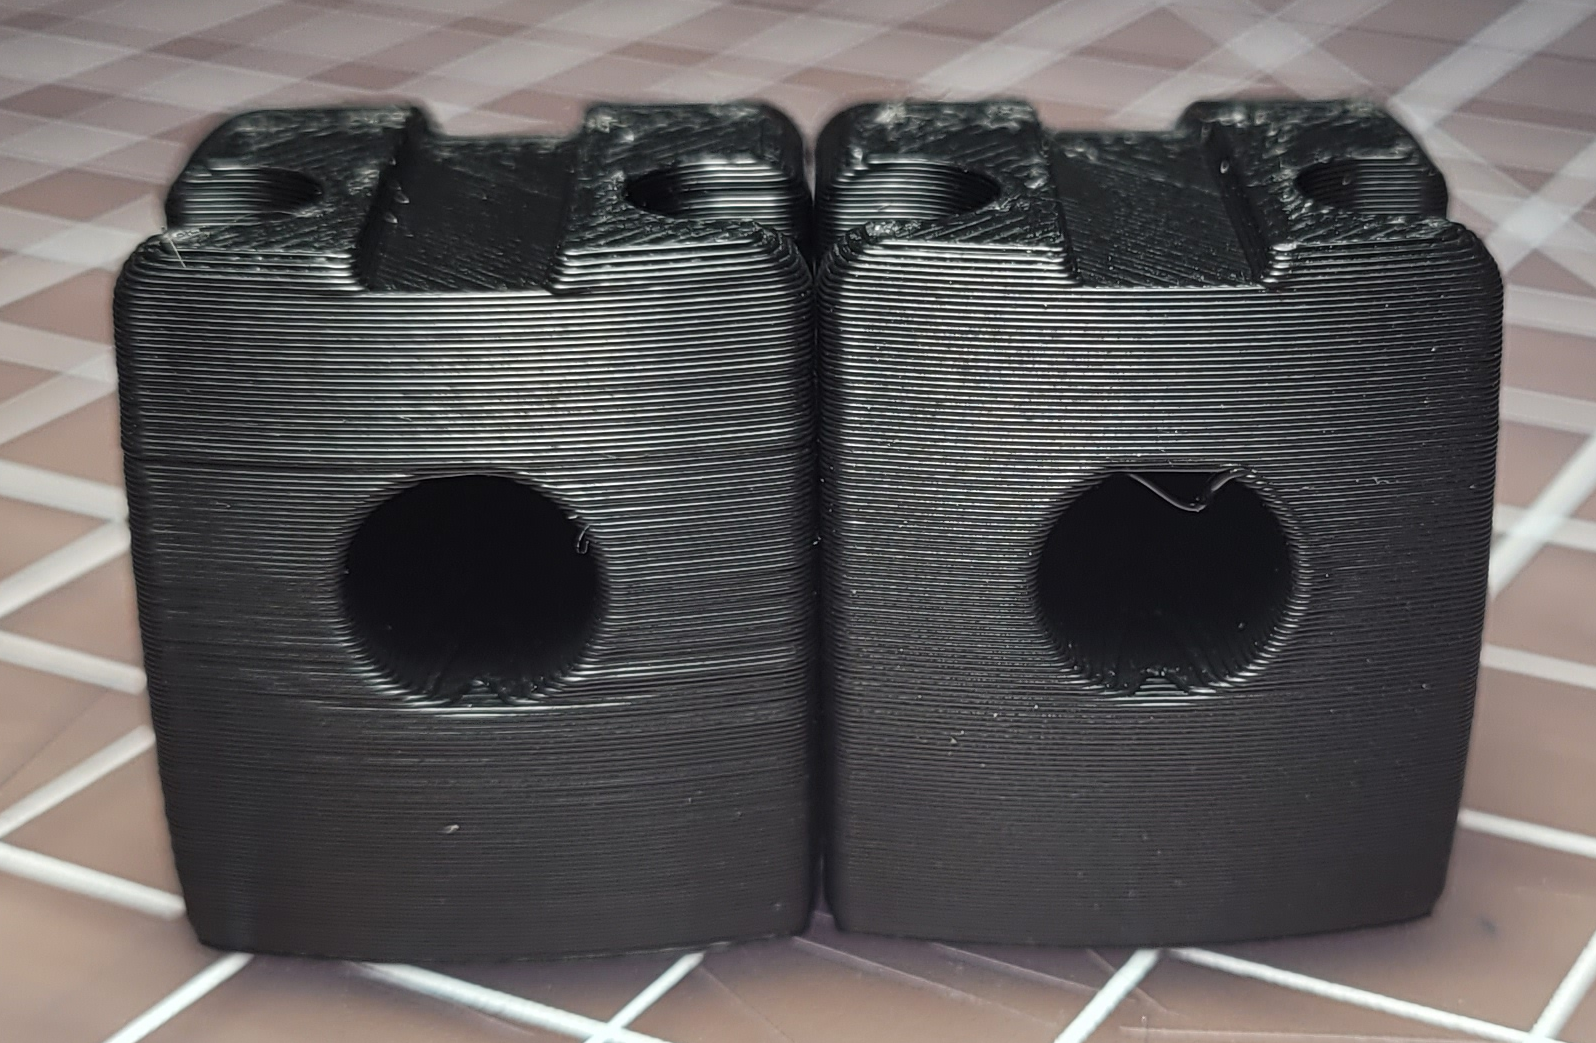
 - “Wood Grain”:
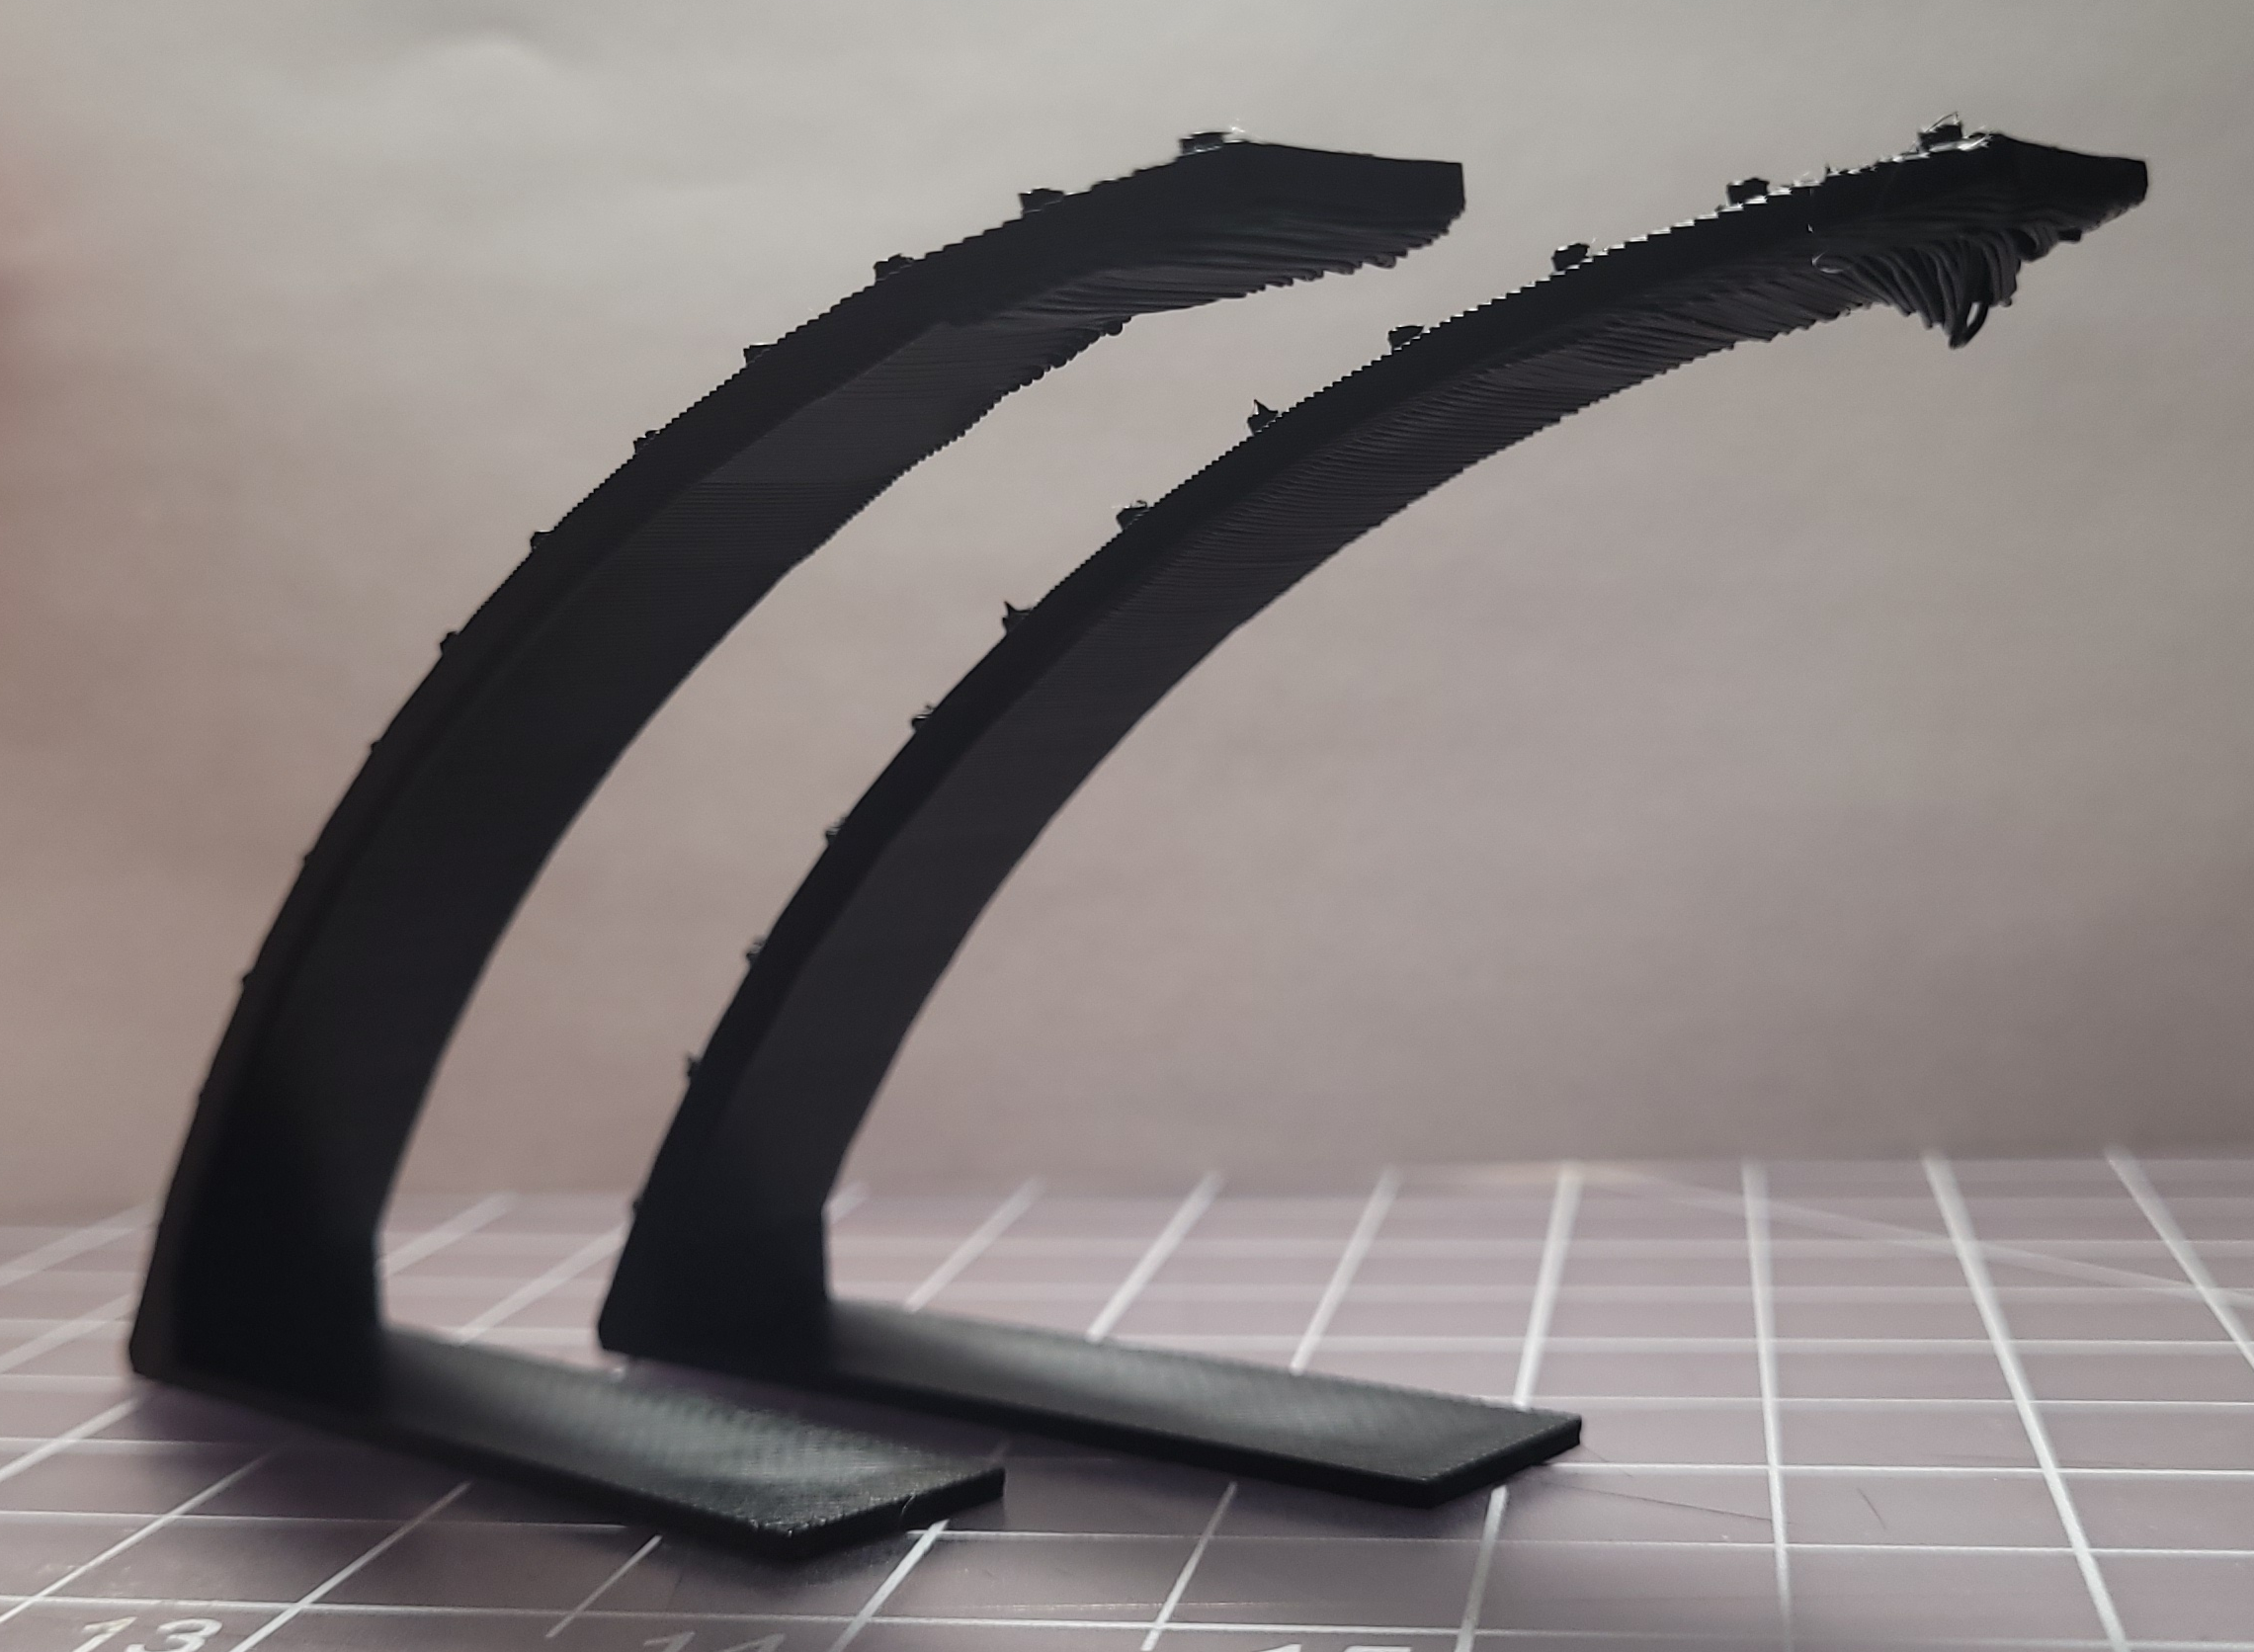
- Diagonal patterns:
Note: this kind of pattern can also be caused by mechanical issues with printer axes.
Test Prints
See the ![]() test prints from MihaiDesigns
test prints from MihaiDesigns
External Perimeters First
Printing external perimeters first can help with extrusion consistency and with ![]() bulging issues.
bulging issues.
This is moreso about general extrusion inconsistency rather than wood grain specifically, but it may still help.
- PS/SS:
external_perimeter_first -
Cura: “Wall Ordering” -> “Outside To Inside”
-
-
 With external perimeters first, it’s especially important to ensure that you have a good stepover for your overhangs. It’s less resistant to poor stepover.
-
External perimeters first can still negatively affect extreme overhangs, and occasionally cause some other oddities, so just keep it in mind when troubleshooting. It’s generally okay for daily use, though.
-
-


Extruder Backlash
Ensure that you have some ![]() backlash between the motor gear and the plastic gear.
backlash between the motor gear and the plastic gear.
- Gauge this with filament loaded and the spring tensioned (the backlash will reduce a bit once it is loaded).
- You want a tiny amount of backlash (but as little as possible - this is just to make sure that you haven’t over tensioned the gears. Too much tension can cause accelerated wear.)
- Too much backlash can cause issues with pressure advance and retractions.
- You may need to re-tune PA (and sometimes esteps) after adjusting this.
- This is not adjustable on some extruders like the Orbiter (doesn’t have the same backlash issues anyway in my experience!)
- Adjusting backlash can help considerably with these issues, but is not always guaranteed to fix it.
Too Little Backlash
- Repeating patterns in extrusion (see above)
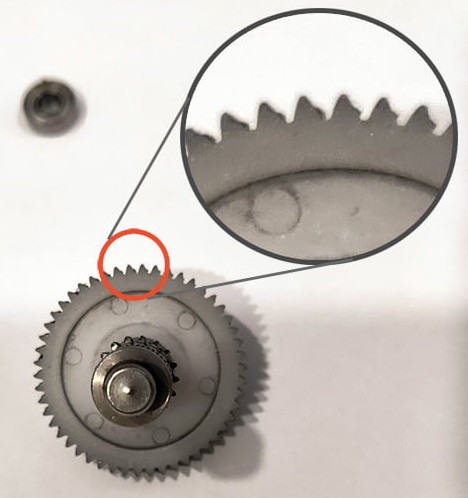
- Accelerated wear and damage of the plastic gear, further contributing to repeating patterns in extrusion.
-
This can cause permanent extrusion consistency issues until replacement. Check the spaces between the gear teeth. This gear is damaged:
-
-

Too Much Backlash
- Repeating patterns in extrusion (see above)
- Clacking noises during retraction and pressure advance moves
- Pressure advance consistency issues (such as causing ideal PA values to differ for accelerations and decelerations).
- Stringing
Other Factors
- Try adjusting your filament tension screw/thumbscrew (if equipped).
- Poor quality or misaligned extruder parts can contribute to these issues.
- For BMG parts, Bondtech or Trianglelab are best.
- Any eccentricity or misalignment in the extruder gears will contribute to these patterns.
-
Here is an excellent video showing this effect, and the source for the linked images.
-
Weaslus#8108 is working on a testing methodology to help narrow down causes. See his GitHub page on the subject.
-
This methodology is still in testing.
- He is looking for feedback. Please direct any feedback to the #off_topic_theorycrafting channel in the Voron Discord Server and tag him.
-
-
- Anecdotally, Galileo/Orbiter seem to be less likely to have these extrusion patterns in my experience. Bowden systems are also less prone, presumably due to the bowden springiness acting as a buffer.
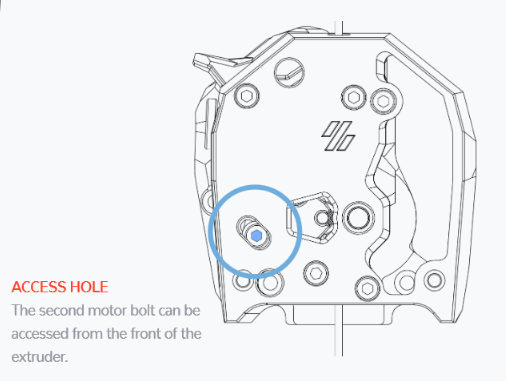
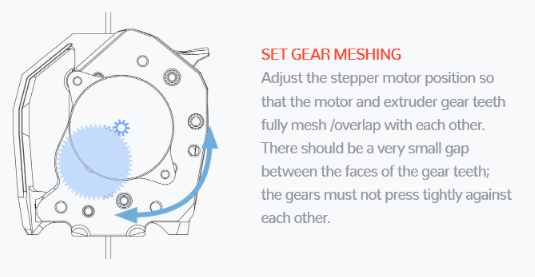
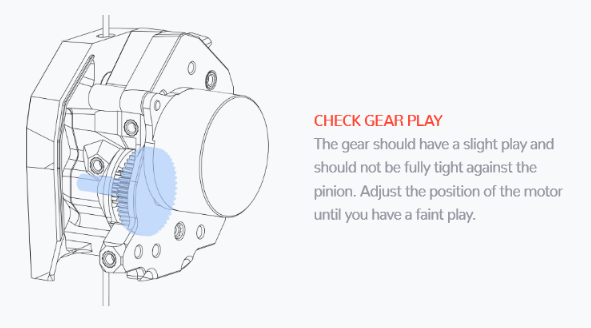
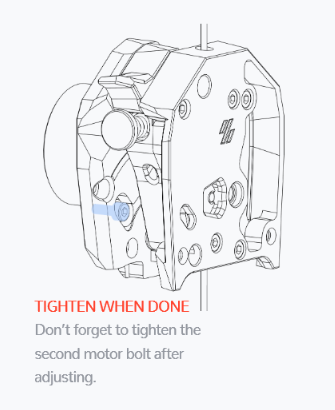
Clockwork 2
These screenshots are directly from the manual.
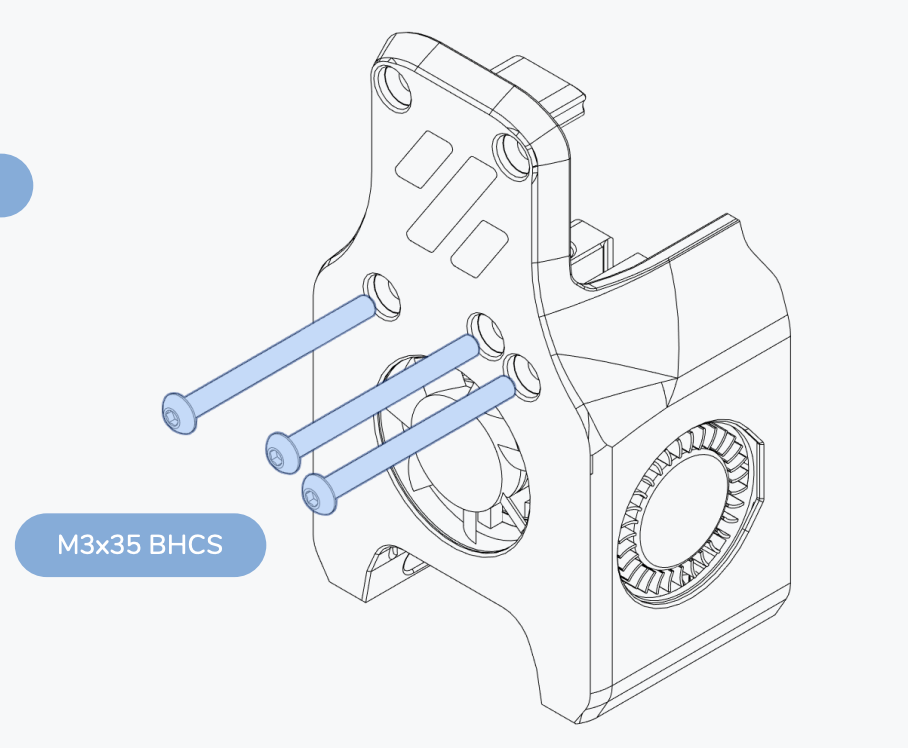
Clockwork 1
This is adjusted by moving the motor itself up and down.
The motor plate has 3 slotted screw holes to allow for adjustment:
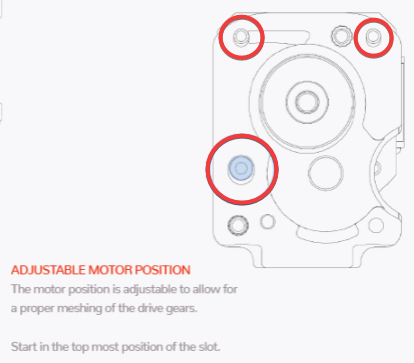
- The top two screws are easily reachable.
- The bottom left screw can be reached by opening the filament latch fully and using a ball-end hex driver.
Mini Afterburner
I don’t have a Mini Afterburner so I can’t give an exact process for tweaking it. I believe it also has some slotted screw holes to allow for adjustment.
I have heard that loosening and threadlocking these screws may also help with its extrusion consistency: