Pattern Method
![]() This page is compatible with Klipper, Marlin, and RepRapFirmware.
This page is compatible with Klipper, Marlin, and RepRapFirmware.
- You should
calibrate your extruder first.
Marlin: Linear advance must be
enabled in firmware. Not all printers have it enabled by default.
Visit my ![]() calibration tool.
calibration tool.
-
Fill out the form to generate the g-code and then print it.
- I won’t go into much detail here, or this article will become 20 pages long. Treat it like a slicer.
- Most of these settings should be relatively intuitive, or have descriptions explaining what they do.
- Some tips:
-
 Make sure to read all the tooltips! (hover over the tooltip icon to the right of some input boxes).
-
 If you use slicer acceleration control, make sure you enable that option and set it to your external perimeter acceleration.
 - Otherwise it will use your default (max) acceleration, or whatever you currently have it set to. If you have a high maximum, this will cause ringing and throw off the test results.
(I disabled this by default because that option was confusing newer folks who don’t yet use slicer acceleration control)
- Otherwise it will use your default (max) acceleration, or whatever you currently have it set to. If you have a high maximum, this will cause ringing and throw off the test results.
-
-
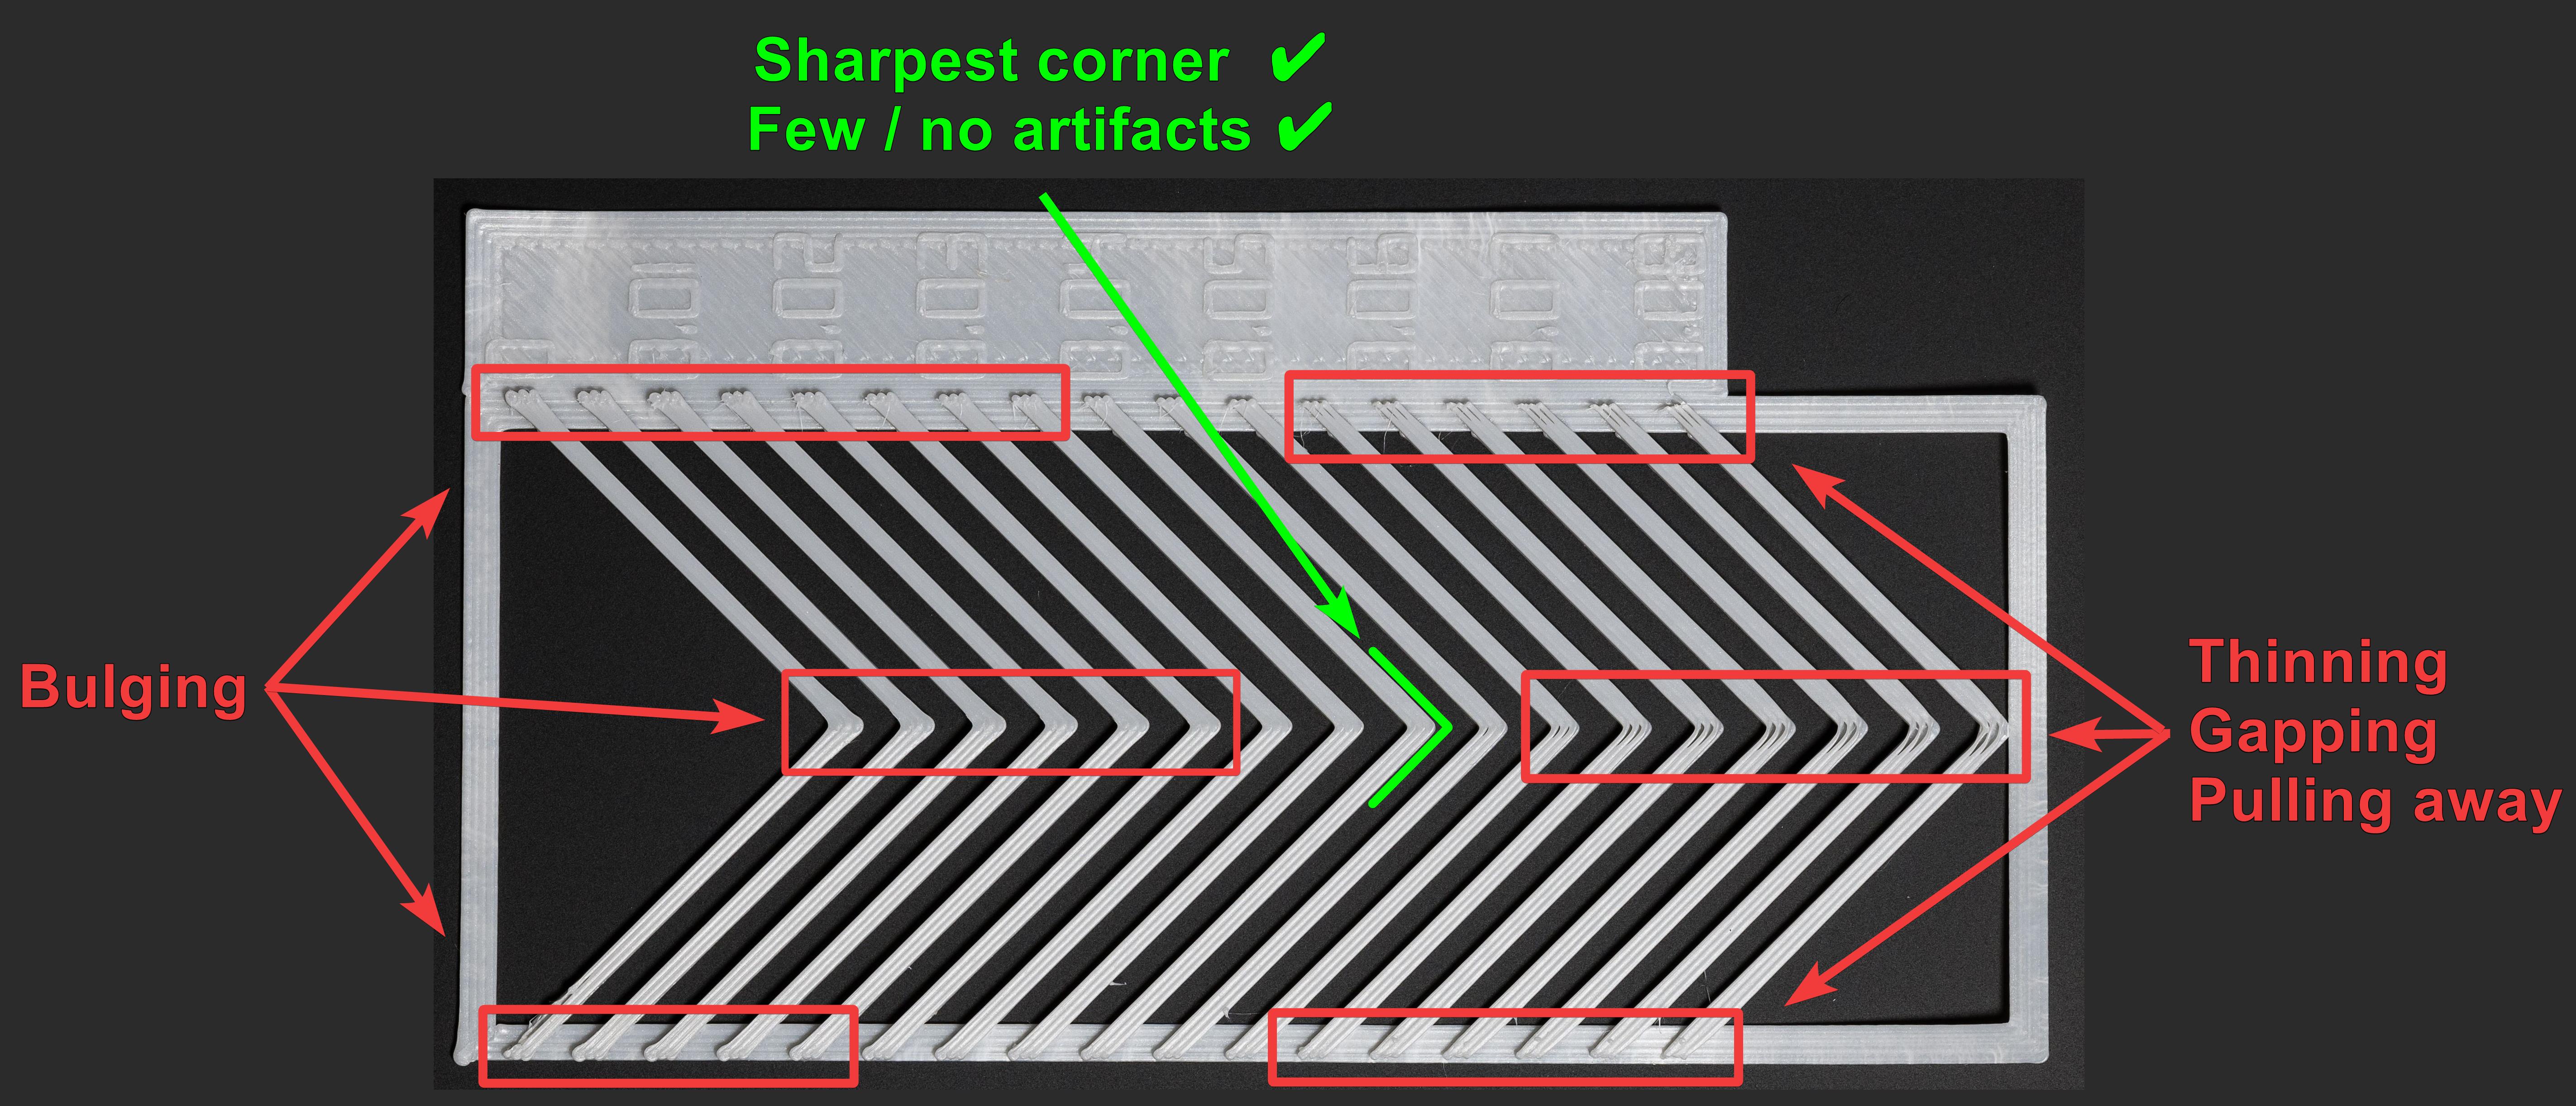
You should get a result like this:
What You’re Looking For
You are looking for the sharpest corner with the fewest artifacts (gaps, bulges, divots).
- Note - there is rarely such thing as perfect pressure advance. You are not looking for perfection here! Just as close as you can get.
Imagine you’re holding a machinist’s square over each corner.
(No need to ACTUALLY use a square.)
In this example, I would choose around 0.04 (in green).
Click the image to open. Ctrl + scroll up / down to zoom.

I find I get the best real prints when I lean toward higher values.
-
For example - if your sharpest corner has a tiny bit of gapping, I’d still personally choose it.
(And then I’d just cover up the slight gapping with single top perimeters - which is unfortunately exclusive to SuperSlicer.) -
The sharpness of these corners has a large effect on the outer surface or prints, particularly surrounding features like logos, text, slots, etc.
I personally run the test again at 0.001-0.002 intervals (with direct drive) once I have found a range to work in.
It’s up to you how finely you want to tune!
See ![]() Saving Your Value.
Saving Your Value.
![]() If you can’t get a clean corner, or you have gapping and bulging at the same time, you likely have extruder issues.
If you can’t get a clean corner, or you have gapping and bulging at the same time, you likely have extruder issues.
- One thing to check is your
 extruder backlash. This is a common cause, but only one of many!
 - Make sure there is no “dead zone” when reversing extruder directions by hand.
- Make sure nothing is misaligned or loose.
- On bowden extruders, ensure that your tube fittings have minimal/no play.
It’s often faster to just rebuild your extruder than to burn an entire day troubleshooting.
