Small Infill Areas Look Overextruded
![]() This page is compatible with all printers.
This page is compatible with all printers.
Table of contents
Things to Try
Some amount of this is unavoidable and is totally normal.
But, there are some things that may help a bit:
- Use single top perimeters (SuperSlicer). This simply makes these infill areas a bit larger.
- Try reducing your pressure advance smooth time (I use 0.02).
- Direct drive can handle lower smooth times than bowden. Going too low will cause extruder skipping during PA movements.
- Run the PA pattern test afterwards to make sure you haven’t introduced any skipping.
- There seem to be diminishing returns here, at least in my testing. There’s no need to tune this down as low as physically possible.
- Direct drive can handle lower smooth times than bowden. Going too low will cause extruder skipping during PA movements.
- Try reducing top infill speeds and accelerations.
- Again, there are diminishing returns here. On my printer, I stop seeing noticeable improvements below around 2k acceleration. Your mileage may vary.
- Ensure that your extruder gears don’t have too much
 backlash.
 - You want a tiny amount of backlash (but as little as possible - this is just to make sure that you haven’t over tensioned the gears. Too much tension can cause extrusion patterns and accelerated wear.)
- Too much backlash can cause issues with pressure advance and retractions.
- You may need to re-tune PA (and sometimes esteps) after adjusting this.
- This is not adjustable on some extruders like the Orbiter (doesn’t have the same backlash issues anyway in my experience!)
- You want a tiny amount of backlash (but as little as possible - this is just to make sure that you haven’t over tensioned the gears. Too much tension can cause
- Sometimes you can change your infill angle to avoid short infill lines, but this is highly geometry dependent.
- Concentric top infill patterns can help with some STLs, but again, it’s highly geometry dependent. (And the aesthetics are love-it-or-hate-it).
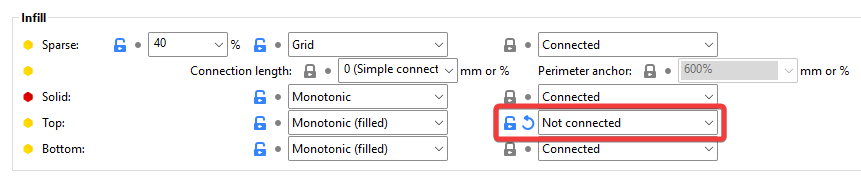
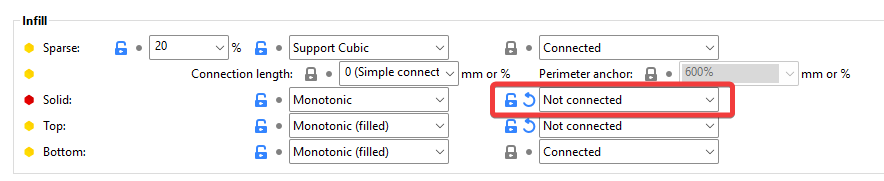
“Not Connected” Top Infill (SuperSlicer)
I find that setting top infill to “not connected” makes a noticeable improvement.
This is default behavior in Cura. In Prusa Slicer, it can be configured by setting the “Top fill pattern” to “Monotonic lines”.
-
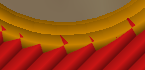
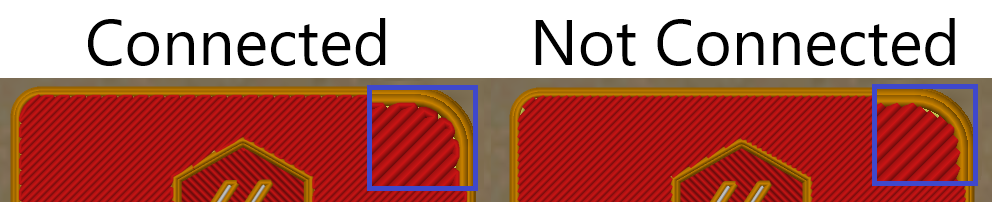
 This setting overshoots perimeters more than “connected” does. If you have raised your infill/perimeters encroachment (overlap), consider setting it back to default (for now. You can fine-tune later).
 - Overshoot
- Reset infill/perimeter encroachment

-
Lower values can cause sparse infill to disconnect from the perimeters.

- One fix for this is to enable
infill_anchor_max:
- Result:

- Overshoot


What it Does
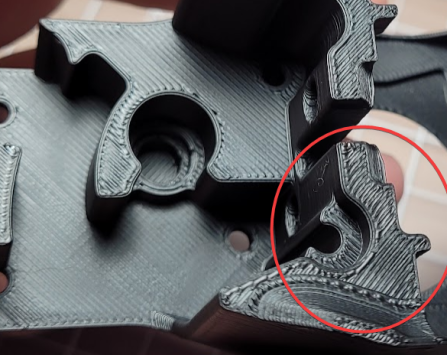
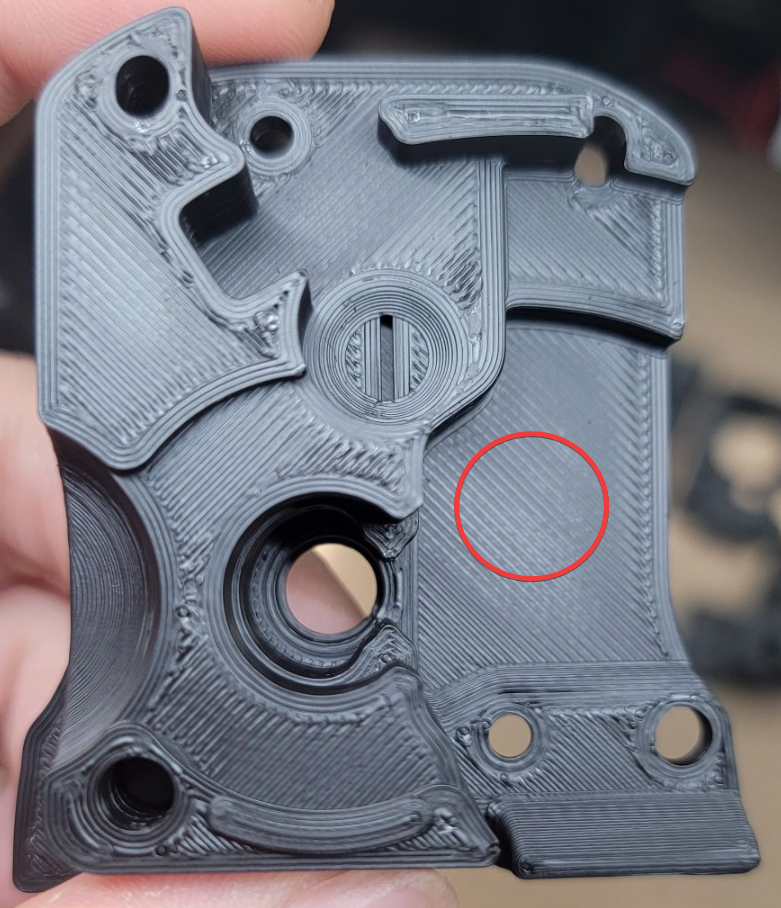
When assessing extrusion multiplier, always look at the widest areas in a given print.
(Excerpt from the ![]() Extrusion Multiplier article)
Extrusion Multiplier article)
- You want to tune your extrusion multiplier for the areas where your extrusion system has had a chance to equalize pressure and coast at a constant flow rate.
- In this example, I would primarily be looking at the circled area.
-
While some of this print looks overextruded, I think the overall EM is actually pretty good.
The Magic Bullet?
![]() This section is advanced reading.
This section is advanced reading. ![]()
These techniques have downsides that are only addressable by an EXPERIMENTAL custom SuperSlicer build.
This is only here to share some interesting findings / what I’m tinkering with.
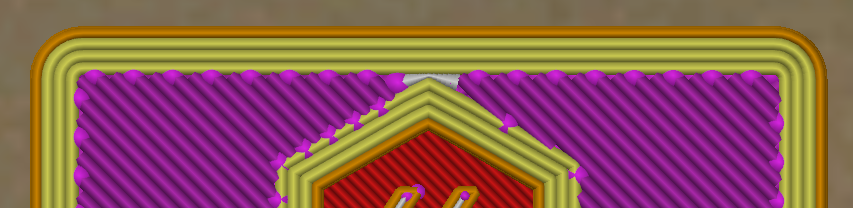
This setting has yielded the largest improvement of all for me. Your mileage may vary of course, but I’m curious to hear your experiences with it.
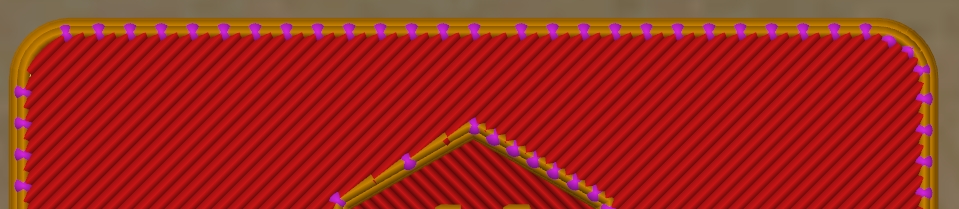
In combination with the “not connected” top infill setting described above, you can set “minimum travel after retraction” to 0.
This will cause a retraction at every direction change.
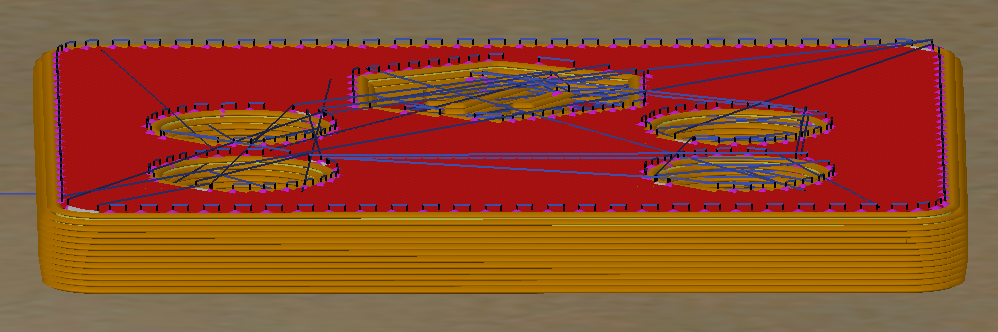
![]() This is very slow with Z hop, however. These successive Z hops can also be quite loud on many printers.
This is very slow with Z hop, however. These successive Z hops can also be quite loud on many printers.
- Setting
- Each purple spot is a retraction.
- Excessive Z hopping.

Making it Faster (Still With Some Downsides)
-
You can turn Z hop off for only the top layer, like so:
-
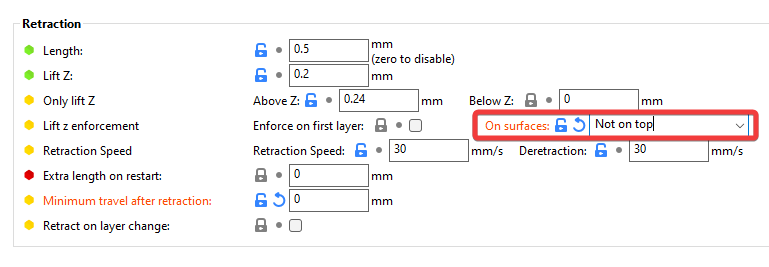
-
Result
-
- This is considerably faster and quieter, however it too carries some downsides:
-
Downsides
- It will still be slower than standard, but not nearly as much as with z-hop. The top layers are something like 30% slower, if I had to guess.
- Disabling Z hop on the top layer carries some risk of:
- Minor surface scarring during travels
- Knocking over parts if you have excessive curling


Solid Infill Considerations
- Further small improvements may be made by also setting solid infill to “not connected”.
-
However,
make sure you also check “only retract when crossing perimeters”. -
-
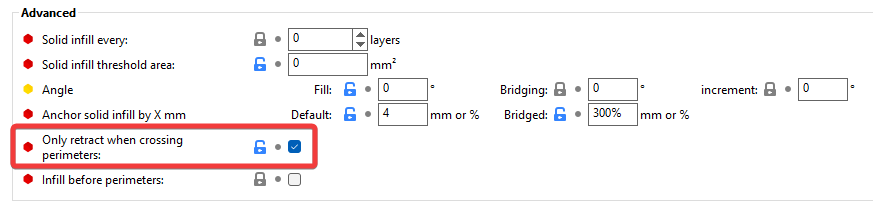
- Otherwise, these additional retractions (and the slowdown!) will occur on ALL solid layers, not just the top.


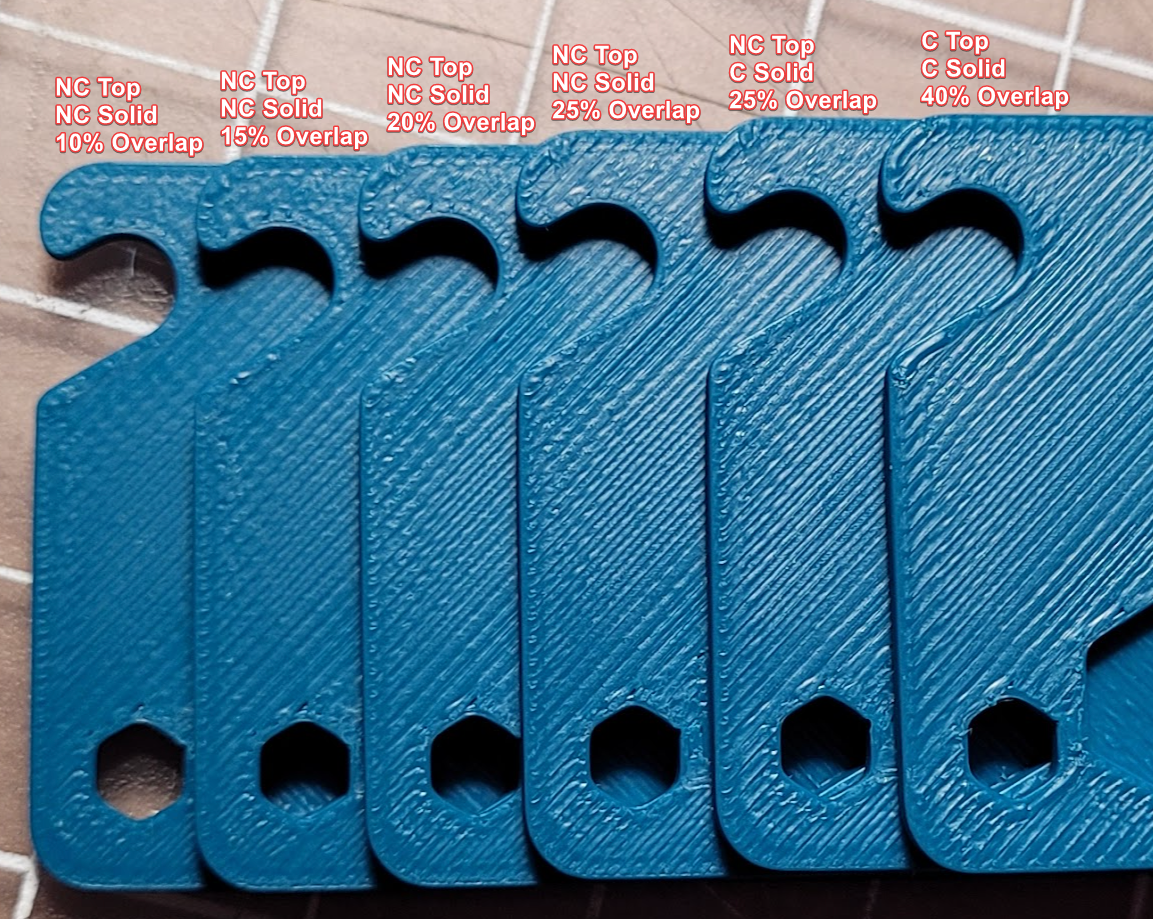
Demonstration
All samples with “not connected” are shown with ![]() top retractions enabled.
top retractions enabled.
Lower overlaps show more small improvements, but also start to create pinholes.
In my case, I decided to stick with NC/NC/25%. Still a nice improvement.
Anything lower would create ![]() pinholes, and as mentioned in
pinholes, and as mentioned in ![]() this section, too low would start to disconnect the infill.
this section, too low would start to disconnect the infill.
The Experimental SuperSlicer Build
- No warranty or support provided! Most of the Mac builds are currently not working either. These are a work in progress.
- Builds: https://github.com/julianschill/SuperSlicer/actions
-
nightly-devis 2.5.59 andrcis 2.4.58. - Most of the Mac builds are not working.
-
- This is the new setting:
-
This (in the right combination) should address the downsides mentioned above.
-
This setting will likely MOVE and be reworked at some point, which may cause future incompatibilities with profiles you save using this.
- You should use a separate appdata folder with experimental SuperSlicer builds by having a separate shortcut using
<path to SS exe> --datadir <separate appdata path>.
- You should use a separate appdata folder with experimental SuperSlicer builds by having a separate shortcut using
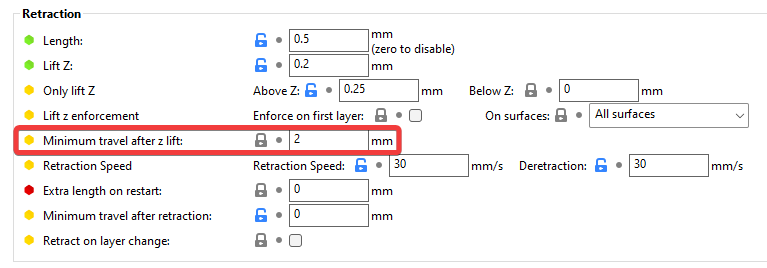
- The winning combination is:
- Top & solid infill: “not connected”
- Encroachment: ~25%
- “Minimum travel after z lift” (The experimental setting): 2 (default)
- “Minimum travel after retraction”: 0
- “Only retract when crossing perimeters”: Enabled.
-
