Lines Method (DEPRECATED)
![]() This page is compatible with Klipper and Marlin.
This page is compatible with Klipper and Marlin.
- You should
calibrate your extruder first.
Marlin: Linear advance must be
-
 This has been deprecated in favor of my new pressure advance tuning tool! See here.
 - The contents of this page may be out of date!
Table of contents
Steps
-
Visit the
pressure advance calibration site.- Thanks to Deuce#8801 for helping with this!
- If you are using Marlin, use Marlin’s linear advance site instead.
-
Fill out the parameters specific to your setup (printer name, bed size, retraction, etc.)
-
Modify the Start G-code section.
Exercise caution here. As mentioned previously, you can damage your printer if you don’t set up the start g-code correctly, for example forgetting QUAD_GANTRY_LEVELorPRINT_START(if used).- This is where you will set your temperatures (
M109/M190). - Copy over your slicer’s start g-code (from your printer profile) and paste it beneath the
M109/M190.- You can usually replace the default gcode beneath the
M109/M190with your own start g-code*, but use your best judgment. The defaults are there as safeguards. -
Klipper
- Stock
PRINT_START/START_PRINTmacros usually contain all the necessary start gcode (minus the temperatures), but please double check.- For Vorons with the stock
PRINT_STARTmacro, this is all you need: - If you are passing variables to
PRINT_START, remember to append them here. Example:PRINT_START HOTEND=240 BED=110- Your variable naming may be different, e.g.
EXTRUDER=Xinstead ofHOTEND=X. - You can then comment out the separate heating g-codes.
- Your variable naming may be different, e.g.
- For Vorons with the stock
- Stock
- Remove the
M112. This is an emergency stop / reading comprehension check to ensure you have reviewed the start gcode. - * If the start g-code from your slicer has any slicer variables (for example
[first_layer_bed_temperature]), make sure to replace them with appropriate values.
- You can usually replace the default gcode beneath the
- This is where you will set your temperatures (
-
Fill out the tuning parameters. Many can be left at defaults, but here are some specific settings that I recommend:
-
Printer
-
Layer Height: 0.2mm*
- *Or the primary layer height that you intend to print at. <0.2mm can make first layer difficult, however.
- *On textured beds, you may want to try 0.25mm to verify if your results are reading high (>0.06 PA on direct drive)
-
Layer Height: 0.2mm*
-
Speed
-
Slow Printing Speed: Your
square_corner_velocityFrom your printer.cfg. Default is 5.-
For Marlin, use your typical jerk value.
-
-
Fast Printing Speed: Your perimeter speed
- If your internal/external perimeter speeds are different, use the faster of the two.
-
See this table to ensure that you are not exceeding the maximum flow rate of your hotend.
- The line widths refer to the “nozzle line ratio” option.
- Default is 1.2 (120%).
- The line widths refer to the “nozzle line ratio” option.
- *If your perimeter speeds are particularly slow, it may be hard to read the results. You may need to use a higher speed here in that case.
- Acceleration: Your perimeter acceleration
-
Slow Printing Speed: Your
-
Pattern
- Starting Value for PA: 0
-
Ending Value for PA:
- Direct Drive: 0.1
- Bowden: 1.5*
-
PA Stepping:
- Direct Drive: 0.005
- Bowden: 0.05*
-
Test Line Spacing:
- Voron 0 (120mm bed): 4
- Default: 5
- Print Anchor Frame: Checked
-
Advanced
- Nozzle Line Ratio: 1.2
- Prime Nozzle: Unchecked
- Dwell Time: 0
* These bowden values cover a wide range of PA (0-1.5), because each bowden setup can vary widely. Once you narrow down a general range to work in, you may want to run the test again with a narrower range of PA values.
-
Printer
-
Generate and download the g-code file.
-
Print it, and inspect the results.
- In the below example, I would choose about 0.055.
Result
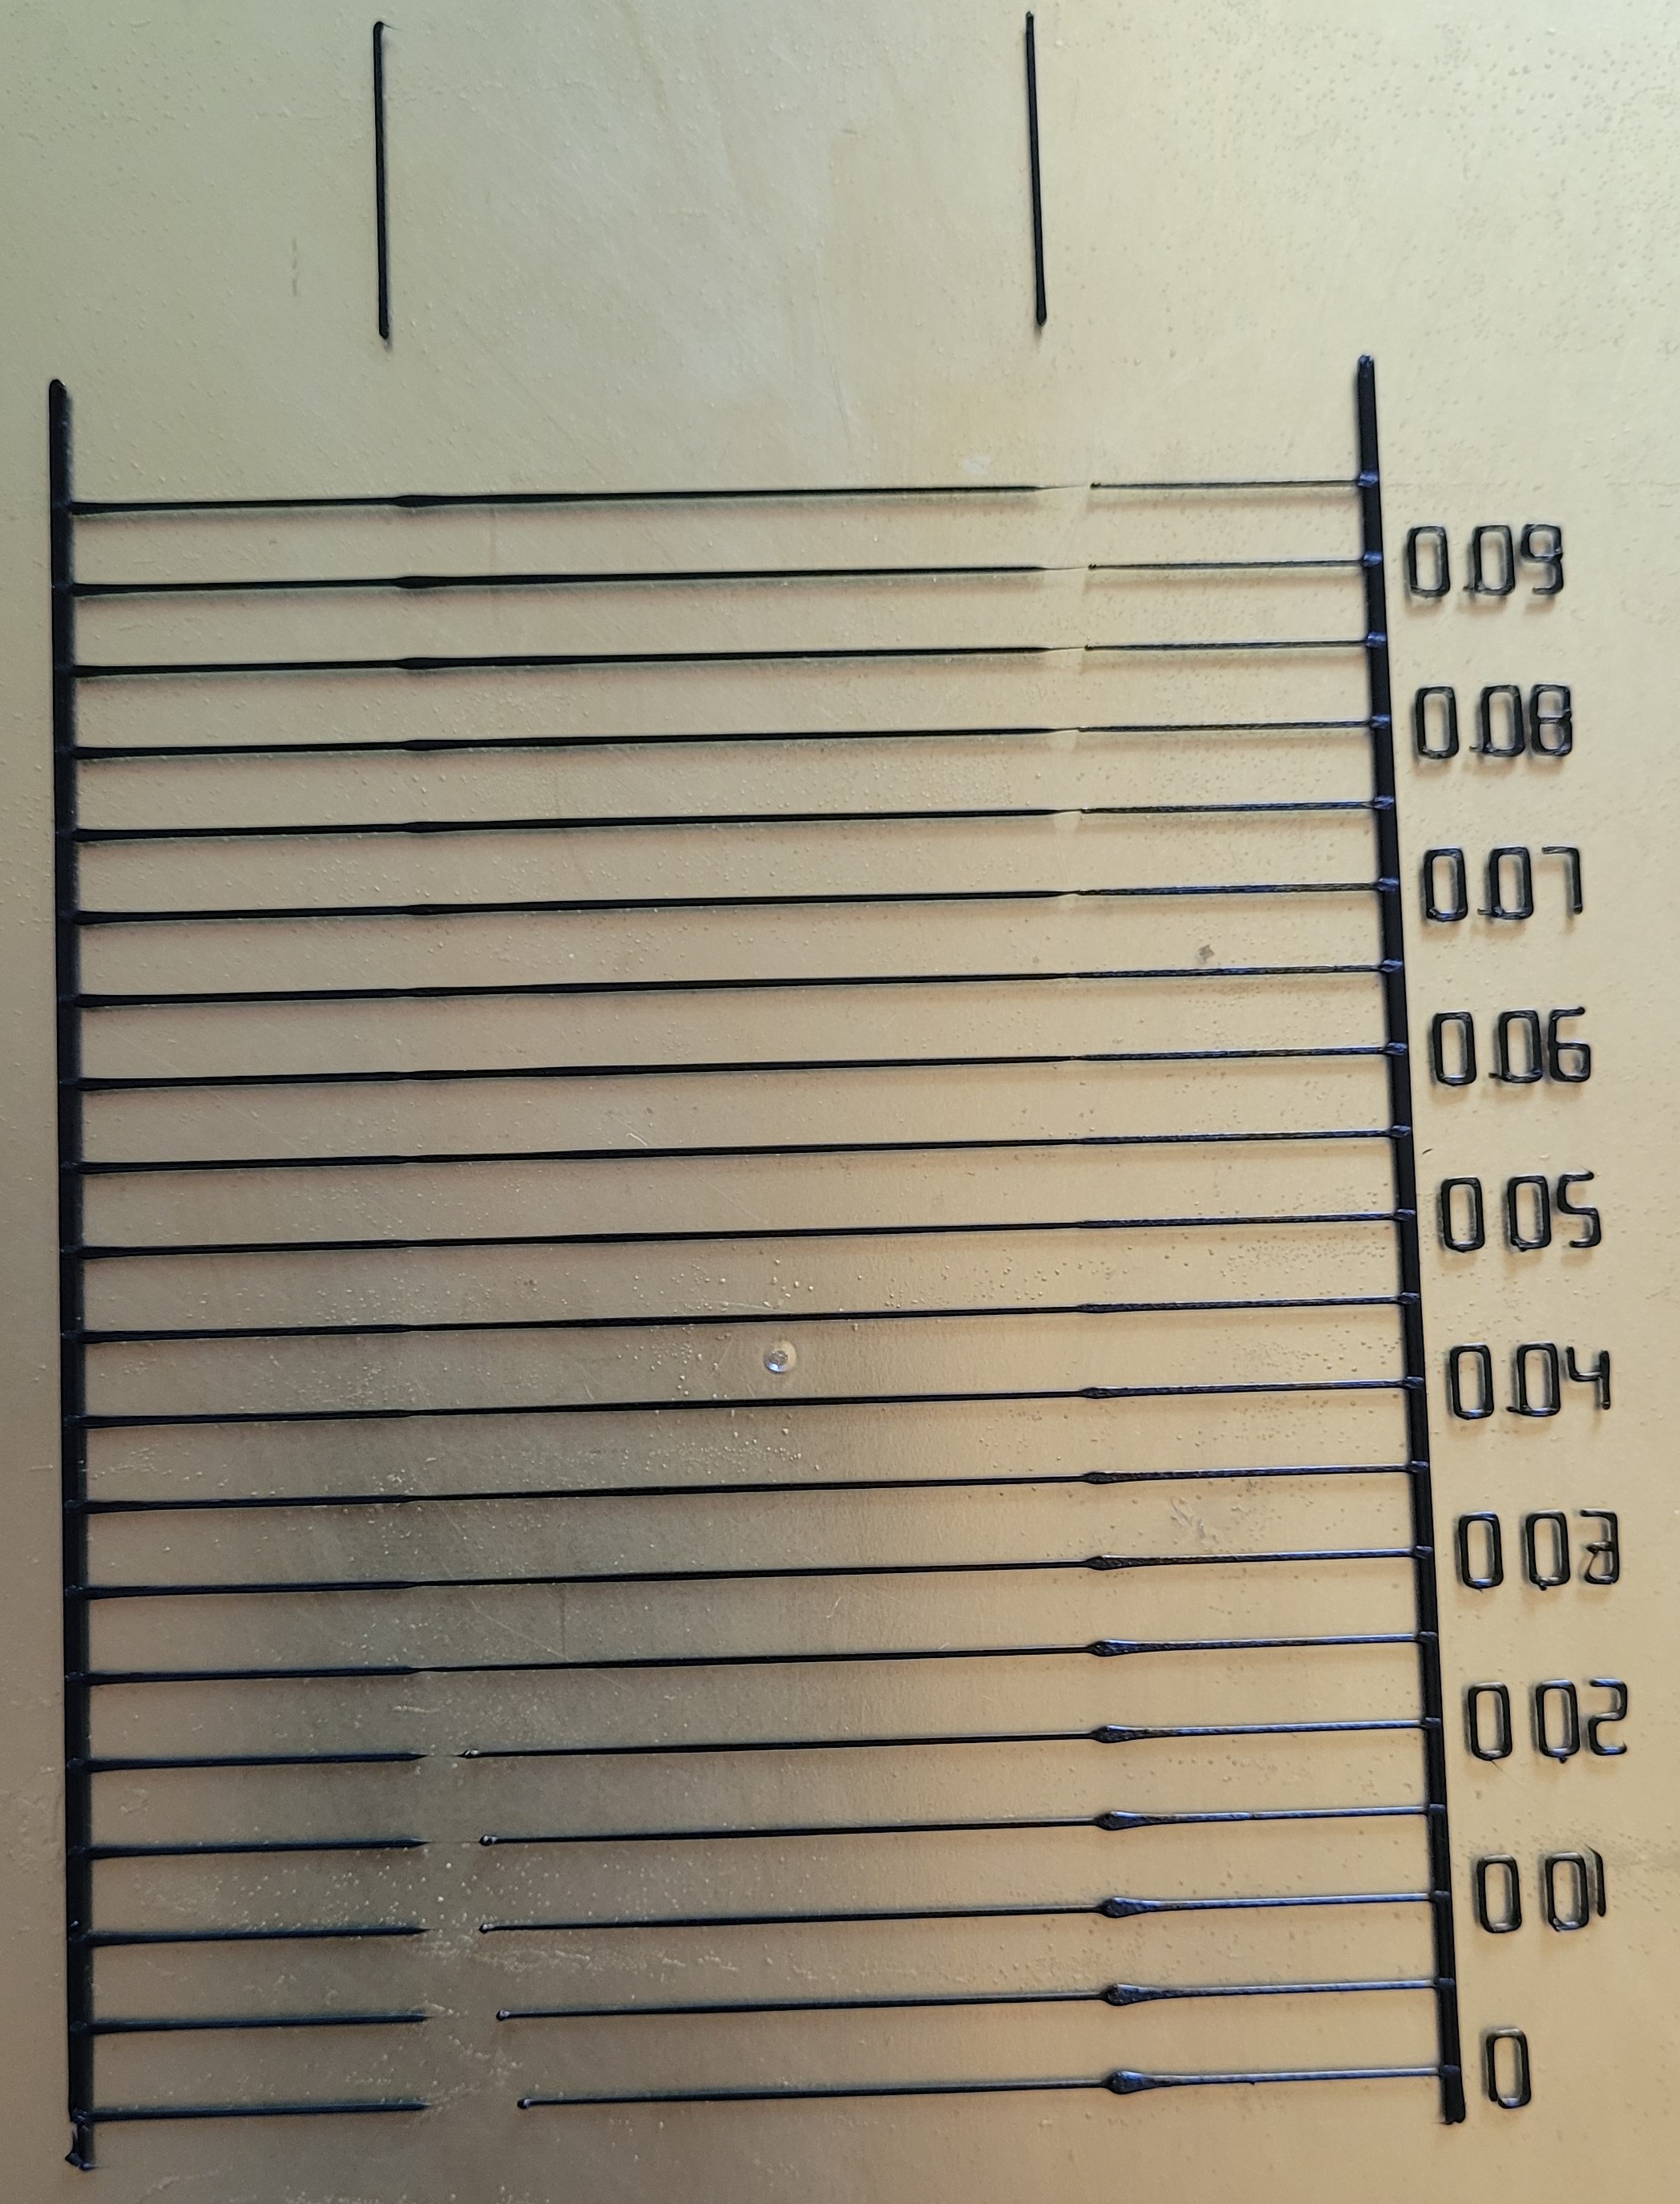
- This is a great visual representation of what I mentioned earlier: that pressure advance is rarely perfect.
- Always choose the lower value if you are not entirely sure.
- Sometimes the best acceleration and decelerations values will not be on the same line. In this case, you should pick a midpoint between both.
- If they are more than a line or two apart, see the next section.
- In the below example, I would choose about 0.055.
-
See
Saving Your Value.


Anomalies / Issues
This PA test also serves as a nice extruder stress test, and it’s a great visual indicator for extrusion issues. It ensures that your extruder/hotend can handle your requested speeds, PA, and accelerations.
- If your best accel/decel PA values are more than a line or two apart:
- You may have too much backlash in your extruder. Pressure advance uses a reverse extruder move during decelerations. Excessive backlash causes some of that reverse move to be lost.
- See here for more information on the effects of backlash/gear tension.
- You still want a tiny amount of backlash (when filament is loaded) to ensure your extruder gears aren’t over tensioned. Essentially as little as you can manage.
- This is not adjustable on some extruders like the Orbiter (doesn’t have the same backlash issues anyway in my experience!)
- You may have too much
- If your PA numbers are unusually high:
- This may indicate a partial nozzle clog or that your hotend temperature is too low. More back pressure means more pressure advance.
- If the middle (fast) section is not printing, or is only partially printing:
- Your printer is having issues extruding at faster speeds. You may be outrunning your hotend, have your temperature too low / incorrect thermistor type in your config, have your extruder motor currents incorrect, have a partial clog, or have an extruder assembly issue. See here for more in-depth troubleshooting.
- If this only happens above your ideal PA value, it’s not an issue.
